Getting Started with Bicep: Building Your First Bicep Template
Table of Contents
In the first section, Getting Started with Bicep, an ARM DSL for Azure, we went through what is Azure Bicep, and how to install Bicep on your machine. Now, we will learn how to build our first Bicep Template.
Bicep Declaration Overview
First, lets look at a Bicep declaration in a basic form:
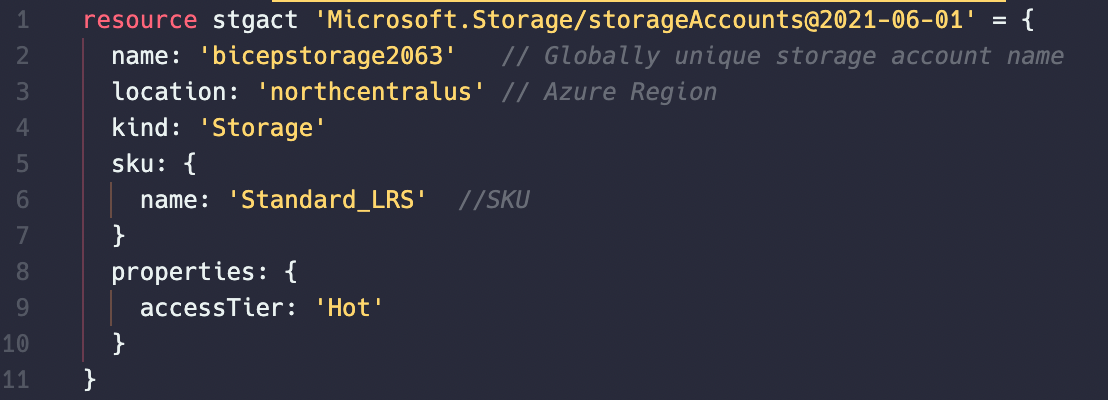
The highlighted Resource (below) indicates the start of the declaration of a new resource in Azure to deploy.
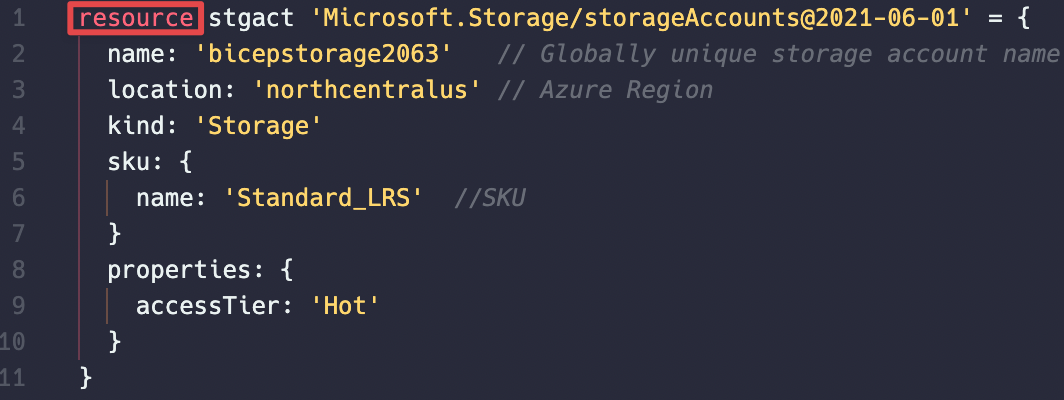
Next, we have the Symbolic Name (in my example: stgact), which is an identifier within the Azure Bicep file. This will allow you to get the properties from the declared resource to be used in other resources elsewhere. Keep in mind, this is not the name of the Azure resource that is deployed.
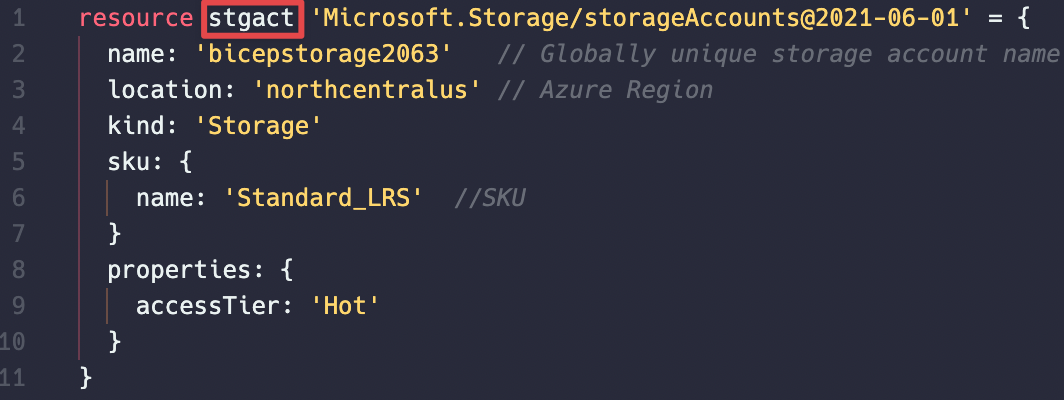
Following the Symbolic Name, we have the Resource Provider.
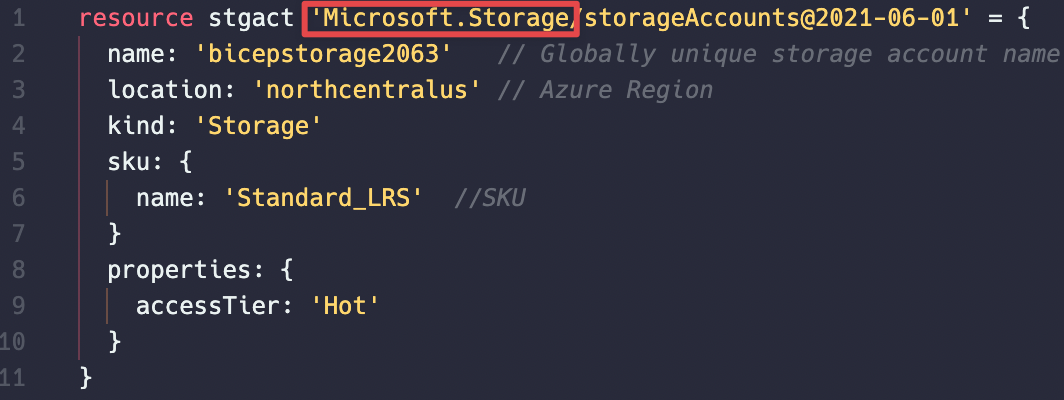
Next, we have the Resource Type, this is the Azure Resource Type name for the resource that is being declared.
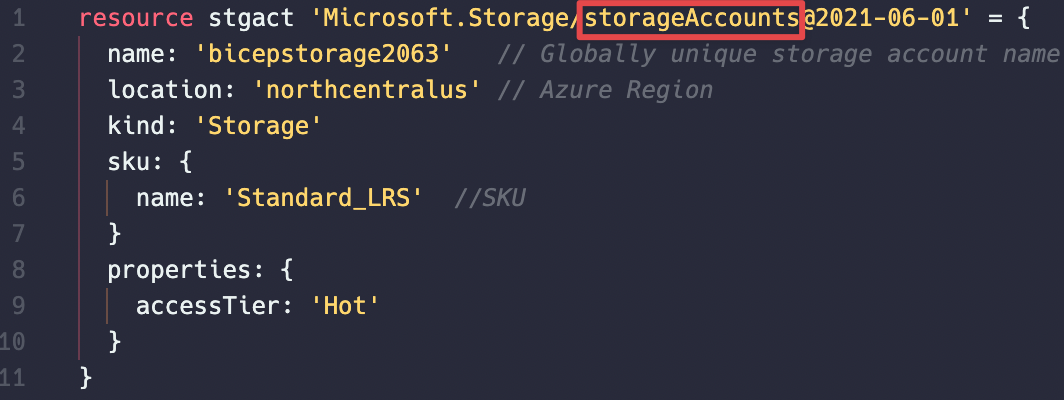
and finally, at the end is the API version. The API version is separated from the resource type by the ‘@’ character. You must have an Azure Resource Provider apiVersion specified. This requirement comes from Azure Resource Manager (ARM) and will be similar to the apiVersion specified in ARM Templates. The API version corresponds to a version of REST API operations that are released by the resource provider. As a resource provider enables new features, it releases a new version of the REST API. The resource explorer displays valid API versions for the resource type.
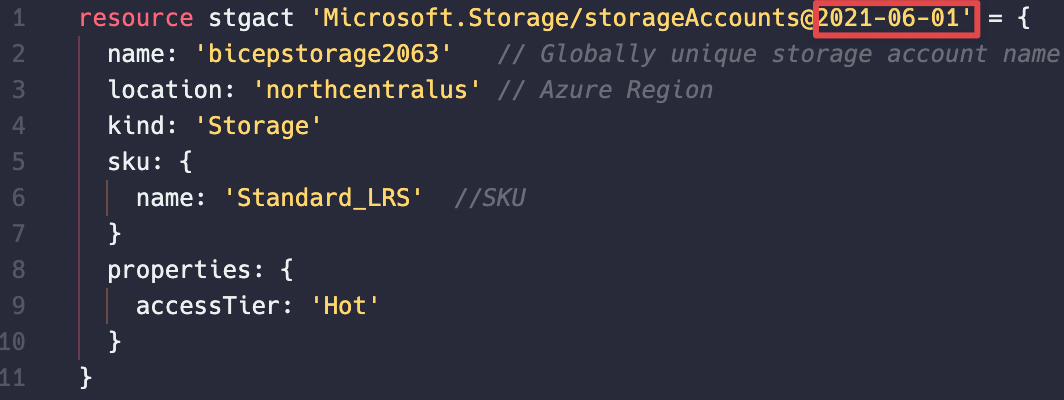
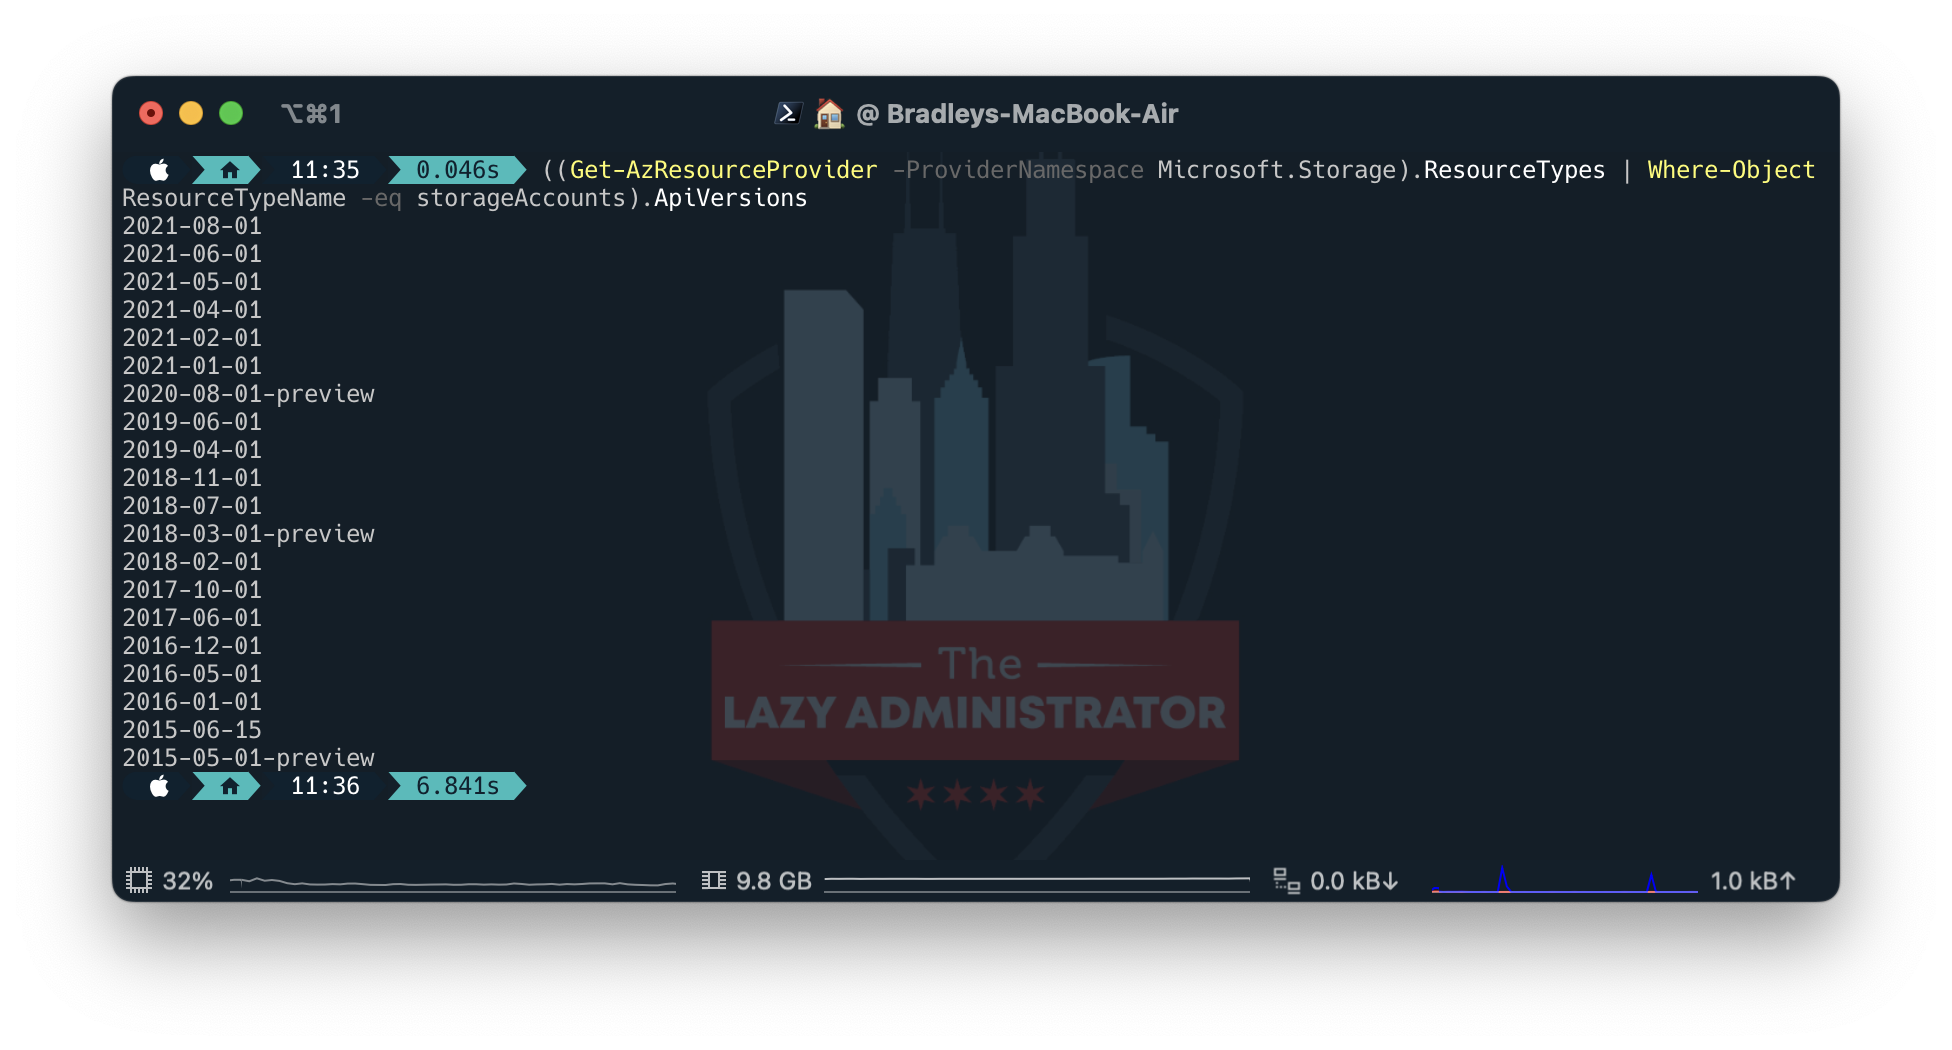
You can use the intellisense in VSCode to view possible API versions when creating a resource declaration or you can also use PowerShell to see what API versions are available on each Resource Provider.
((Get-AzResourceProvider -ProviderNamespace Microsoft.Storage).ResourceTypes | Where-Object ResourceTypeName -eq storageAccounts).ApiVersions
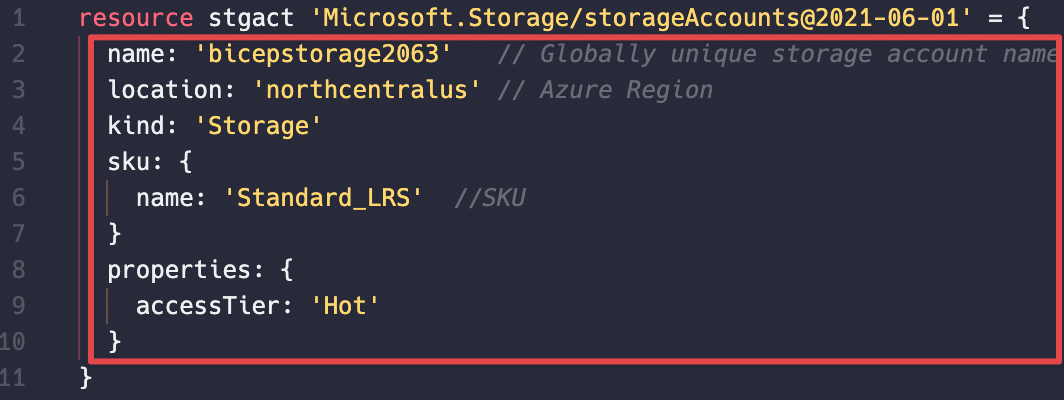
 Next, we have the Properties section, which is everything contained within the ‘{ }’ brackets within the resource declaration. Every resource in Azure has at least a name property and almost every resource has a location property. The location property is the Azure region where the resource is going to be deployed to.
Parameters
Parameters allow you to make your template reusable by allowing you to customize different properties. These parameters can be required to be passed in when the template is deployed, or given a default value within the bicep template.
Once parameters have been declared within Bicep code, you can reference them anywhere in the .bicep file where you need to use the parameters value.
In the example below, I have added two parameters:
storageAccountName: The value is the name I want my storage account to have
location: The value is the azure region location my resource will be deployed to
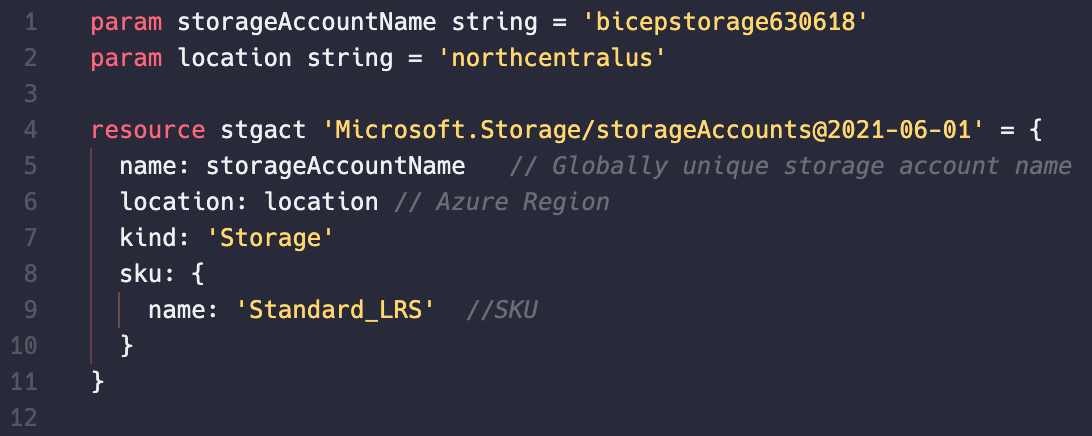
I then replaced the name and location values on line 5 and 6 with the name of the parameter.
Parameters are declared using ‘param’ followed by the name of the parameter and then the type (in my example the type is ‘string’). Lastly, a value for the parameter is entered. Providing a value is not mandatory, if you do not provide a value in the bicep template then you will be required to provide one during runtime.
There are several different data types we can use with parameters in bicep.
Booleans
When specifying boolean values, use true or false. Don’t surround the value with quotation marks.
param exampleBool bool = true
Integers
When specifying integer values, don’t use quotation marks.
param exampleInt int = 1
Objects
Objects start with a left brace ({) and end with a right brace (}). In Bicep, an object must be declared in multiple lines. Each property in an object consists of key and value. The key and value are separated by a colon (:). An object allows any property of any type. Don’t use commas to between properties.
aram exampleObject object = {
  name: 'test name'
  id: '123-abc'
  isCurrent: true
  tier: 1
}
Secure strings and objects
‘Secure string uses the same format as string, and secure object uses the same format as object. With Bicep, you add the @secure() modifier to a string or object.
When you set a parameter to a secure string or secure object, the value of the parameter isn’t saved to the deployment history and isn’t logged. However, if you set that secure value to a property that isn’t expecting a secure value, the value isn’t protected. For example, if you set a secure string to a tag, that value is stored as plain text. Use secure strings for passwords and secrets.’1
@secure()
param password string

@secure()
param configValues object
Variables
Variables are used to simplify your Bicep template development. Rather than repeating complicated expressions throughout your Bicep template, you define a variable that contains the complicated expression. Then, you use that variable as needed throughout your Bicep file.
A variable can’t have the same name as a parameter, module, or resource.
Variables are defined by using the var keyword followed by the variable name, then the equal sign (‘=’), and lastly, the value to assign to the variable.
var <variable-name> = <variable-value>
In the example below, a new variable is created called, ‘location’ with a value of ‘northcentralus’. This is then used on line 6.
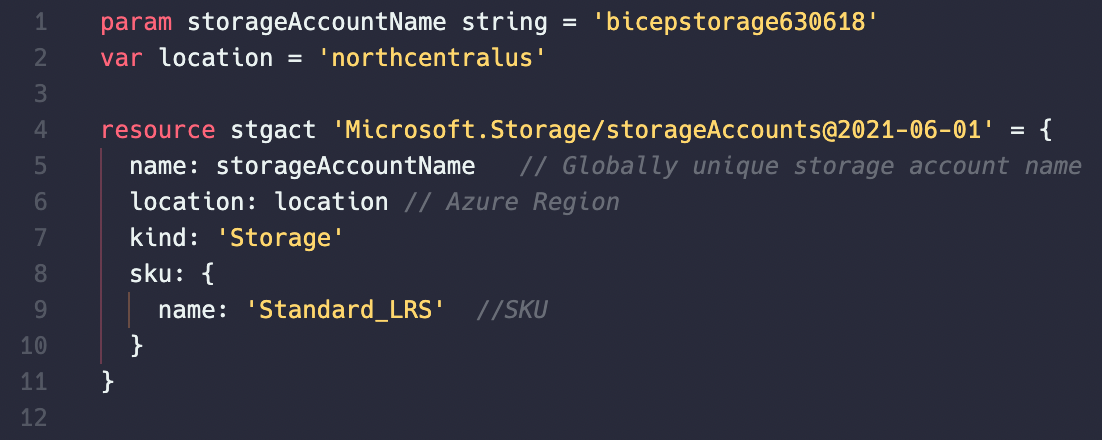
Notice that you don’t specify a data type for the variable like you would with a parameter. The type is inferred from the value. There are several data types supported for use with variables in Azure Bicep code.
- array
- bool
- int
- object
- string
We already saw how a string variable is declared, let’s take a look at some other examples.
Array
Arrays start with a left bracket ([) and end with a right bracket (]). In Bicep, an array must be declared in multiple lines. Don’t use commas between values.
var exampleArray = [
  1
  2
  3
]
Boolean
When specifying boolean values, use true or false. Don’t surround the value with quotation marks.
var falsevar = false
Integers
When specifying integer values, don’t use quotation marks.
var counter = 1
Objects
Objects start with a left brace ({) and end with a right brace (}). In Bicep, an object must be declared in multiple lines. Each property in an object consists of key and value. The key and value are separated by a colon (:). An object allows any property of any type. Don’t use commas to between properties.
var storageObject = {
  sku: 'Premium'
  location: 'northcentralus'
}
Multi-Line Strings
In Bicep, multi-line strings are defined between three single quote characters (''') followed optionally by a newline (the opening sequence), and three single quote characters (''' – the closing sequence). Characters that are entered between the opening and closing sequence are read verbatim, and no escaping is necessary or possible.
// evaluates to "hello!"
var myVar = '''hello!'''

// evaluates to "hello!" because the first newline is skipped
var myVar2 = '''
hello!'''

// evaluates to "hello!\n" because the final newline is included
var myVar3 = '''
hello!
'''

// evaluates to "  this\n    is\n      indented\n"
var myVar4 = '''
  this
    is
      indented
'''
Using Variables and Parameters Together
You can use the value from a parameter or another variable when constructing another variable.
param inputValue string = 'deployment parameter'

var stringVar = 'preset variable'
var concatToVar =  '${stringVar}AddToVar'
var concatToParam = '${inputValue}AddToParam'
Output Variables
You use outputs when you need to return values from the deployed resources.
An output can have the same name as a parameter, variable, module, or resource. Each output value must resolve to one of the data types.
Output variables in Azure Bicep use the following format:
output <name> <data-type> = <value>
‘The following example shows how to return a property from a deployed resource. In the example, publicIP is the symbolic name for a public IP address that is deployed in a Bicep file. The output value gets the fully qualified domain name for the public IP address.’2
output hostname string = publicIP.properties.dnsSettings.fqdn
Get output values
When the deployment succeeds, the output values are automatically returned in the results of the deployment.
To get output values from the deployment history, you can use Azure CLI or Azure PowerShell script.
(Get-AzResourceGroupDeployment -ResourceGroupName <resource-group-name> -Name <deployment-name>).Outputs.resourceID.value
Next: Getting Started With Bicep: Compiling, Deploying, and Decompiling
Sources
1: Data types in Bicep – Azure Resource Manager | Microsoft Docs
2: Outputs in Bicep – Azure Resource Manager | Microsoft Docs

My name is Bradley Wyatt; I am a 5x Microsoft Most Valuable Professional (MVP) in Microsoft Azure and Microsoft 365. I have given talks at many different conferences, user groups, and companies throughout the United States, ranging from PowerShell to DevOps Security best practices, and I am the 2022 North American Outstanding Contribution to the Microsoft Community winner.