Automatically Schedule Microsoft Teams Do Not Disturb Presence Based on Outlook Calendar Events
Table of Contents
In this article I will be showing you how you can automatically have Microsoft Teams set its presence to Do Not Disturb, or any other presence, based on events in your Outlook Calendar. I also looked into leveraging Power Automate but it began to require premium connectors and at that cost, going the serverless automation route was much cheaper.
An overview of this automation is as follows:
- Run on a set schedule.
- Get all users within the tenant, if the user does not have a mailbox, proceed to the next user, if the user does have a mailbox proceed to the next step.
- Get the users events that will occur within the next 1 hour (configurable value)
- See if there is an event that matches what we are looking for. In my instance, if an event title/subject is “DND” (not case-sensitive) then proceed to the next step, otherwise go to the next user.
- Check to see if the matched event will begin within the next 5min (a configurable value).
- If the event will begin in the next 5min, get the event duration (example: 1hr).
- Set the users Teams Presence to Do Not Disturb (configurable value), and set the duration to the duration of the meeting, in our example it will set it for 1 hour and then change back.
- Repeat
Some things to consider:
- The automation will work with users across time zones regardless of the location of the runbook resource. The time zone is retrieved from the event itself. This means if a user is in Chicago and creates an event to trigger a presence change, and then travels to London, the
originalstartTimeZonewill remain Central Standard Time. This can always be changed on the runbook level to just use a static value, or the location of the runbook itself.- If a matching event is found to begin in 5 minutes or less, it will set the Microsoft Teams presence status. This is a configurable value.
- Be cognizant of how often you are running it and you configured value to set the presence. If you run it once an hour but set it only on matched events starting within 5min, you will have overlap.
- I would probably recommend running this against a smaller subset of users instead of entire tenants.
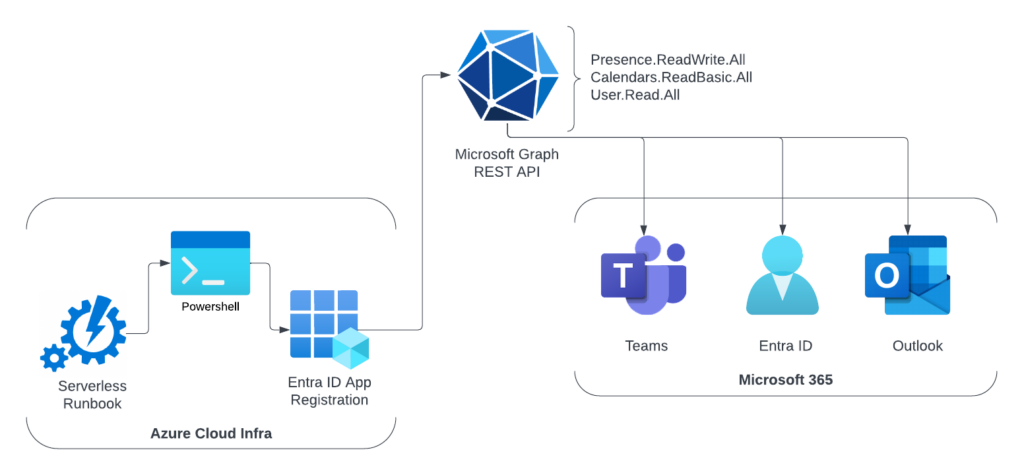
Above is a quick overview on the automation flow. Using serverless automation, a PowerShell Runbook uses an Entra ID application to interface with the Microsoft Graph API, and talk to Microsoft Teams (set the presence), EntraID (get all users), Outlook (get calendar events).
Create the Entra ID Application
First, we need to connect to Azure using Connect-AzAccount
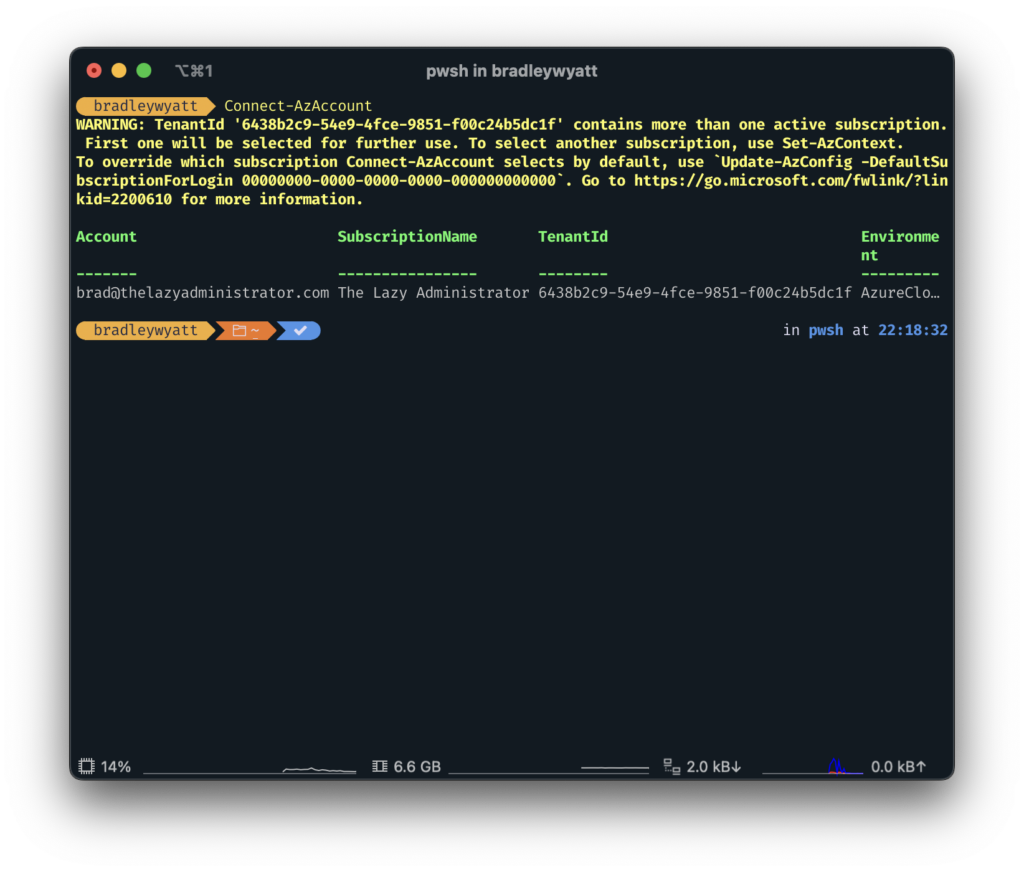
Once connected, we need to create an Entra Application that we will use to connect to the Microsoft Graph REST API.
In my example below, I am creating a new application called MSGraph-TeamsPresence. I am also getting the default tenant domain in order to create a generic Identifier URI.
$Domain = (Get-AzDomain).Domains | Where-Object { ($_ -like "*.onmicrosoft.com*") -and ($_ -notlike "*mail.*")} | Select-Object -First 1
$AppRegistrationSplat = @{
    DisplayName    = "MSGraph-TeamsPresence"
    IdentifierURIs = "http://teamspresence.$Domain"
    ReplyUrls      = "https://www.localhost/"
}
$AzureADApp = New-AzADApplication @AppRegistrationSplat 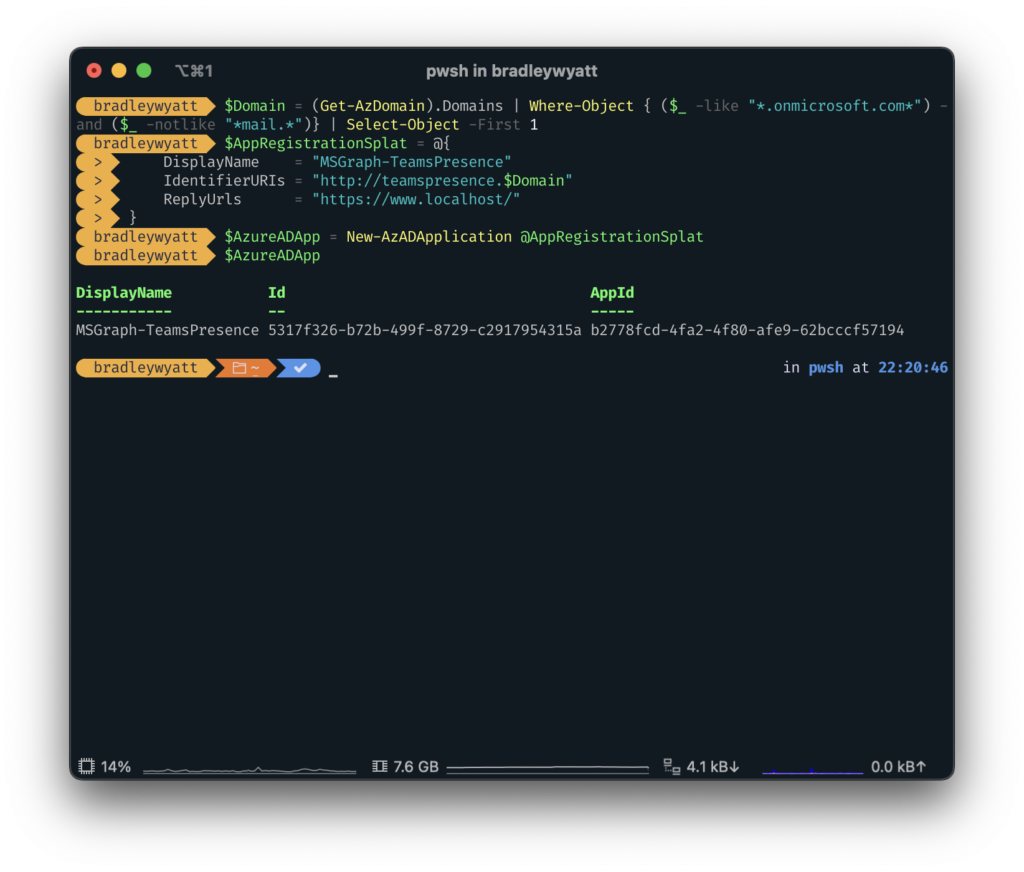
Assign Permissions
Next, we need to give the application the following permissions:
- Calendars.ReadBasic.All
- Presence.ReadWrite.All
- User.Read.All
Luckily, during the process of creating the application we stored the application information in the variable, $AzureADApp so we can call the objectID property of the application by using “$AzureADApp.ID“.
Note: The AppID of 00000003-0000-0000-c000-000000000000 is the application ID for the Microsoft Graph.
$PermissionIDs = @(
  "8ba4a692-bc31-4128-9094-475872af8a53",
  "83cded22-8297-4ff6-a7fa-e97e9545a259",
  "df021288-bdef-4463-88db-98f22de89214"
)
$PermissionIDs | Foreach-Object {
  Add-AzADAppPermission -ObjectId $AzureADApp.ID -ApiId '00000003-0000-0000-c000-000000000000' -PermissionId $_ -Type Role }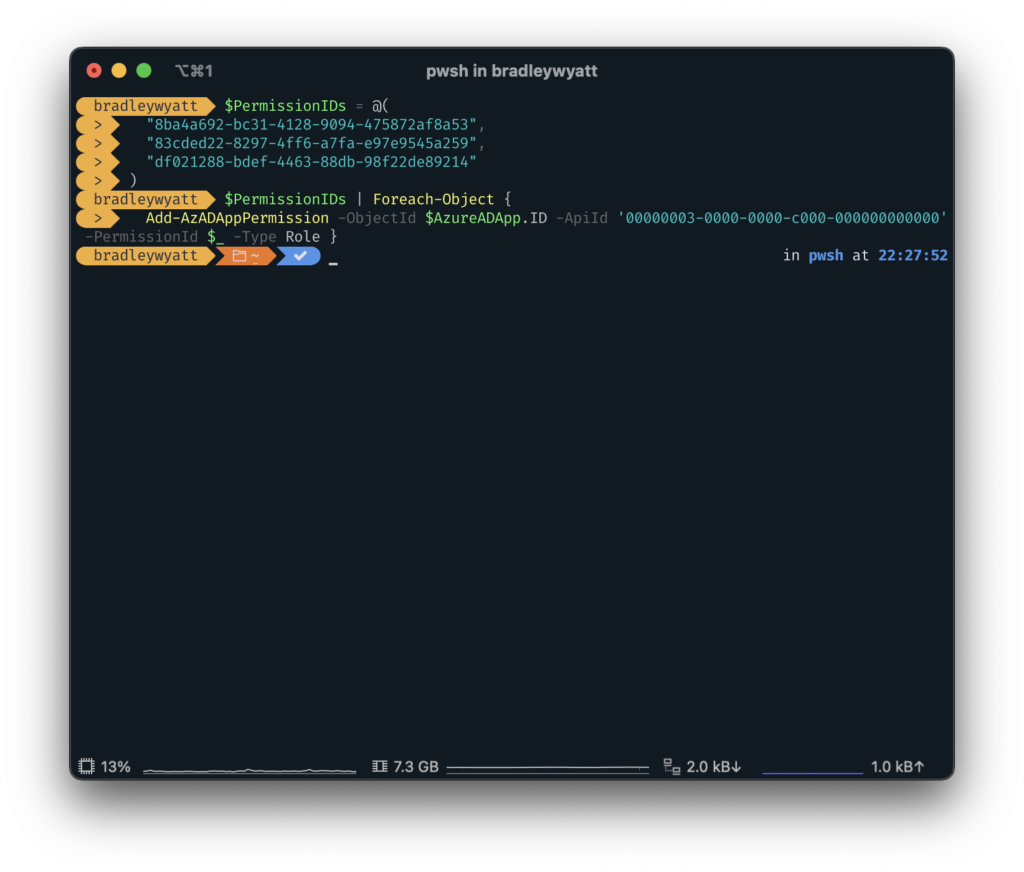
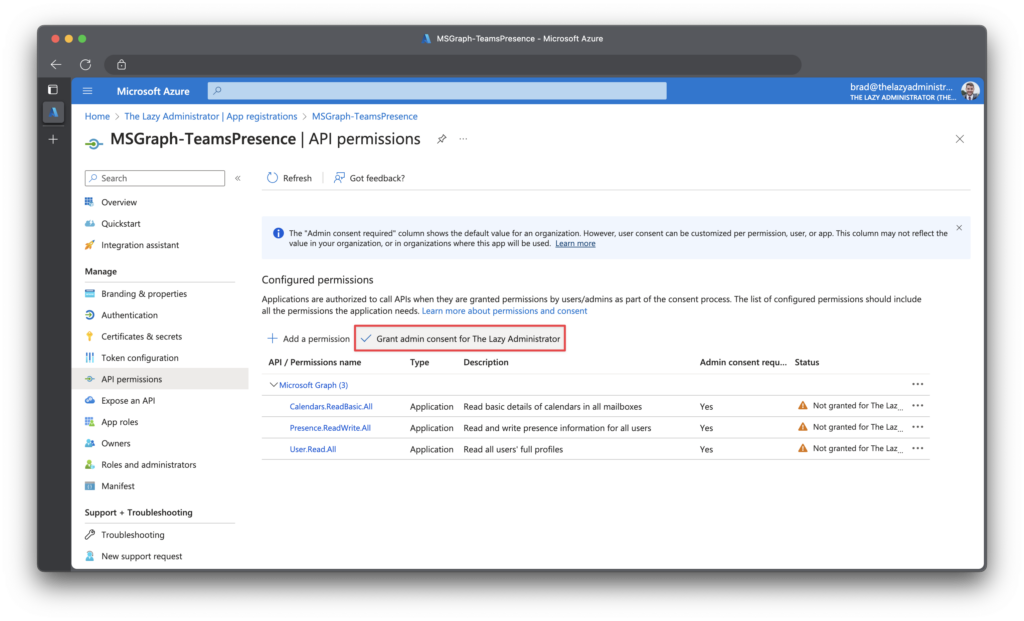
Jumping back into the Azure Portal, we now need to grant admin consent, allowing the application to be granted to permission we assigned. I can see in the status pane that admin consent is required but has not been granted.
To grant admin consent, first click “Grant admin consent…” and then click “Yes“
Create an Application Secret
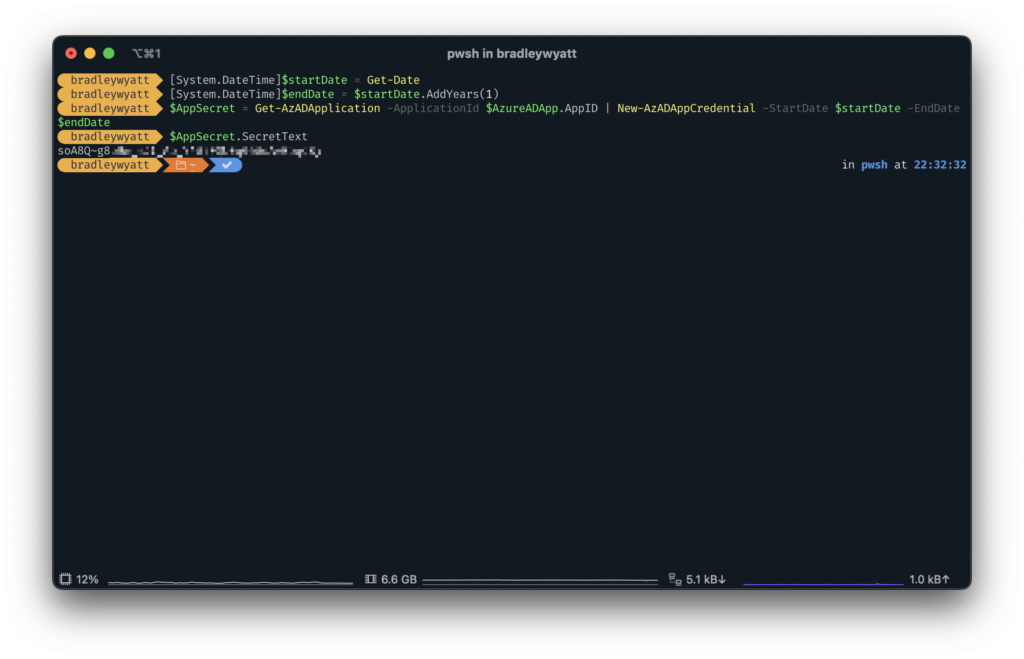
Next, we need to create an application secret to we can connect to the Microsoft Graph API. The secret is similar to a password so it must be protected and secured. In the example below I will create a secret that will expire in one (1) year. Using the variable, “$AzureADApp” that we created earlier, I can call the “AppID” property to fill in our Application ID value.
[System.DateTime]$startDate = Get-Date
[System.DateTime]$endDate = $startDate.AddYears(1)
$AppSecret = Get-AzADApplication -ApplicationId $AzureADApp.AppID | New-AzADAppCredential -StartDate $startDate -EndDate $endDate
By calling “$AppSecret.SecretText” we can retrieve the Secret itself. Take note of the SecretText value for later.
Runbook Logic
Next, I want to step through some of the runbook logic. The code itself will not work on its own but I want to familiarize you with how the runbook functions.
Functions
The runbook has three functions:
- Connect-MSGraphAPI
- Get-MSGraphRequest
- Set-TeamsPresence
Connect-MSGraphAPI
The first function is used to connect to the Microsoft Graph API and return a valid token that we can use to do things like get all of our users, read users calendars, and set teams presence. It requires values for the AppID (the application ID of the Entra application we created earlier), the TenantID and the AppSecret.
Function Connect-MSGraphAPI {
    param (
        [system.string]$AppID,
        [system.string]$TenantID,
        [system.string]$AppSecret
    )
    begin {
        $URI = "https://login.microsoftonline.com/$TenantID/oauth2/v2.0/token"
        $ReqTokenBody = @{
            Grant_Type    = "client_credentials"
            Scope         = "https://graph.microsoft.com/.default"
            client_Id     = $AppID
            Client_Secret = $AppSecret
        }
    }
    Process {
        Write-Verbose "Connecting to the Graph API"
        $Response = Invoke-RestMethod -Uri $URI -Method POST -Body $ReqTokenBody
    }
    End {
        $Response
    }
}
Get-MSGraphRequest
The second function is to perform GET requests against the Graph API. In the runbook we perform two:
- Get all Users in our tenant
- Get a users calendar events that will occur in the next 1 hour (a configurable value)
The function will handle pagination if needed, ensuring it will always return all of the results available.
Function Get-MSGraphRequest {
    param (
        [system.string]$Uri,
        [system.string]$AccessToken
    )
    begin {
        [System.Array]$allPages = @()
        $ReqTokenBody = @{
            Headers = @{
                "Content-Type"  = "application/json"
                "Authorization" = "Bearer $($AccessToken)"
            }
            Method  = "Get"
            Uri     = $Uri
        }
    }
    process {
        write-verbose "GET request at endpoint: $Uri"
        $data = Invoke-RestMethod @ReqTokenBody
        while ($data.'@odata.nextLink') {
            $allPages += $data.value
            $ReqTokenBody.Uri = $data.'@odata.nextLink'
            $Data = Invoke-RestMethod @ReqTokenBody
            # to avoid throttling, the loop will sleep for 3 seconds
            Start-Sleep -Seconds 3
        }
        $allPages += $data.value
    }
    end {
        Write-Verbose "Returning all results"
        $allPages
    }
}
Set-TeamsPresence
The last function sets the Microsoft Teams presence. There are currently 4 available options:
- Available
- Away
- Do Not Disturb
- Busy
One thing to note is that every presence must have an applicable activity set. The following table will show you which activity will be set for which presence.
| Presence | Activity |
| Available | Available |
| Away | Away |
| Do Not Disturb | Presenting |
| Busy | In a Call |
Function Set-TeamsPresence {
    param (
        [Parameter(Position = 0, mandatory = $true)]
        [system.string]$AccessToken,
        [Parameter(Position = 1, mandatory = $true)]
        [ValidateSet('Available', 'DoNotDisturb', 'Away', 'Busy')]
        [system.string]$Presence,
        [Parameter(Position = 3, mandatory = $true)]
        [system.string]$UserID,
        [Parameter(Position = 4, mandatory = $true)]
        [system.int32]$ExpirationDuration,
        [Parameter(Position = 5, mandatory = $false)]
        [system.string]$AppID
    )
    begin {
        if ($Presence -eq "Available") {
            Write-Verbose "Presence will be set to Available"
            $availability = "Available"
            $activity     = "Available"
        }
        if ($Presence -eq "DoNotDisturb") {
            Write-Verbose "Presence will be set to DoNotDisturb"
            $availability = "DoNotDisturb"
            $activity     = "Presenting"
        }
        if ($Presence -eq "Away") {
            Write-Verbose "Presence will be set to Away"
            $availability = "Away"
            $activity     = "Away"
        }
        if ($Presence -eq "Busy") {
            Write-Verbose "Presence will be set to Busy"
            $availability = "Busy"
            $activity     = "InACall"
        }

        Write-Verbose "Building API Call"
        $ReqTokenBody = @{
            Headers = @{
                "Content-Type"  = "application/json"
                "Authorization" = "Bearer $($AccessToken)"
            }
            Method  = "Post"
            Uri     = "https://graph.microsoft.com/v1.0/users/$UserID/presence/microsoft.graph.setPresence"
            Body = @{
                sessionId          = $AppID
                availability       = $availability
                activity           = $activity
                expirationDuration = "PT$ExpirationDuration`M"
            } | ConvertTo-Json
        }
        Write-Verbose $ReqTokenBody.body
    }
    process {
        Write-Verbose "Making API Call"
        Invoke-RestMethod @ReqTokenBody
    }
}
Performance and DateTimes
In order to improve the runbooks performance, when grabbing a user’s calendar events, it will only grab events in the next 1 hour (a configurable value).
When getting events from the API, datetimes are set to UTC, so first we must get the current time in UTC:
$UTCTime = (Get-Date).ToUniversalTime().ToString("yyyy-MM-ddTHH:mm:ssZ")And then an hour from then
$UTCTimePlusHour = (Get-Date).ToUniversalTime().AddHours(1).ToString("yyyy-MM-ddTHH:mm:ssZ")Then, doing a $filter OData query parameter, we can get filtered data returned to us.
(Get-MSGraphRequest -AccessToken $tokenResponse.access_token -Uri "https://graph.microsoft.com/v1.0/users/$($i.id)/calendar/events?`$filter=start/dateTime ge '$UTCTime' and subject eq 'DND' and start/dateTime le '$UTCTimePlusHour'").value Next, in order to accommodate users across multiple time zones, we need to get the timezone of the event:
$targettzoffset = [System.TimeZoneInfo]::FindSystemTimeZoneById("$($_.originalStartTimeZone)").BaseUtcOffsetThen, we need to get the current datetime in that timezone:
$Now = [System.TimeZoneInfo]::ConvertTimeBySystemTimeZoneId([DateTime]::Now, "$($_.originalStartTimeZone)")Using New-TimeSpan we can get the minutes until the event will begin:
$timeUntil = New-TimeSpan -Start $Now -End $_.start.dateTime.AddHours($targettzoffset.hours)Presence Duration / Expiration
The Graph API allows us to set presence and set the duration until it ‘expires’. The maximum value is 240min or 4hours. By getting the duration of the event, we can automatically set the expiration of the presence. Currently, any event over 4hrs will have it set at 4hrs but you can also exclude the property and the user will have to manually change the presence themselves.
 if ($duration.totalMinutes -gt 240) {
   $expirationDuration = 240
}
else {
  $expirationDuration = $duration.totalMinutes
}
Below is a table of some popular configuration questions that may arise.
| Question | Answer |
| What will the presence change to after it expires? | The default presence (most likely ‘available’) or “In a meeting” if it exits to another meeting. |
| What happens if I am in DND and a meeting comes up? | Your presence will remain at Do Not Disturb. |
| Can I manually change the status during a status the automation set? | Yes, and it will remove the expiration, the users change trumps any automation change. |
Setting Up The Serverless Automation
Create the Automation Account and Runbook
Next step is to add this to a PowerShell runbook, this way I am not hardcoding secrets, and its running on a schedule.
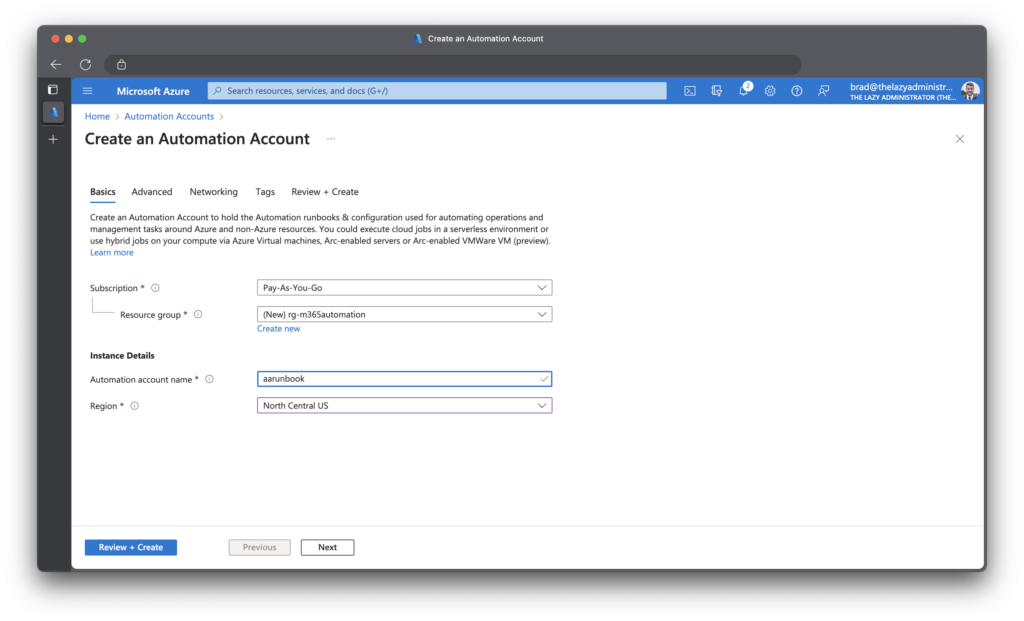
Go to the Azure Portal > Automation Accounts and create a new one or use an existing one.
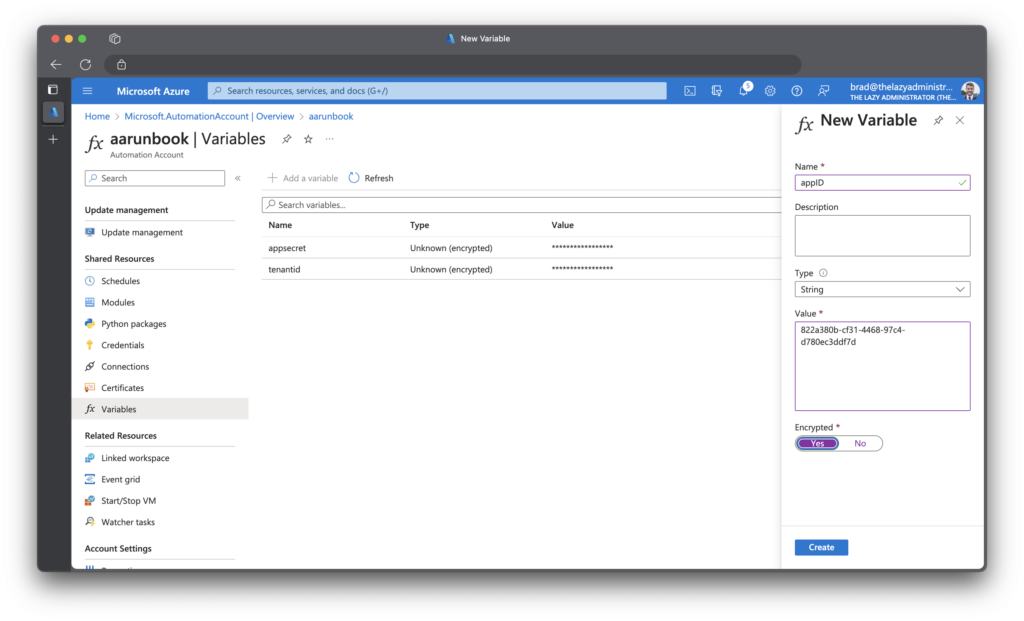
Next, go to your automation account and click Variables. I will be adding three variables:
- tenantID
- appSecret
- appID
Make sure you click Yes for encryption.
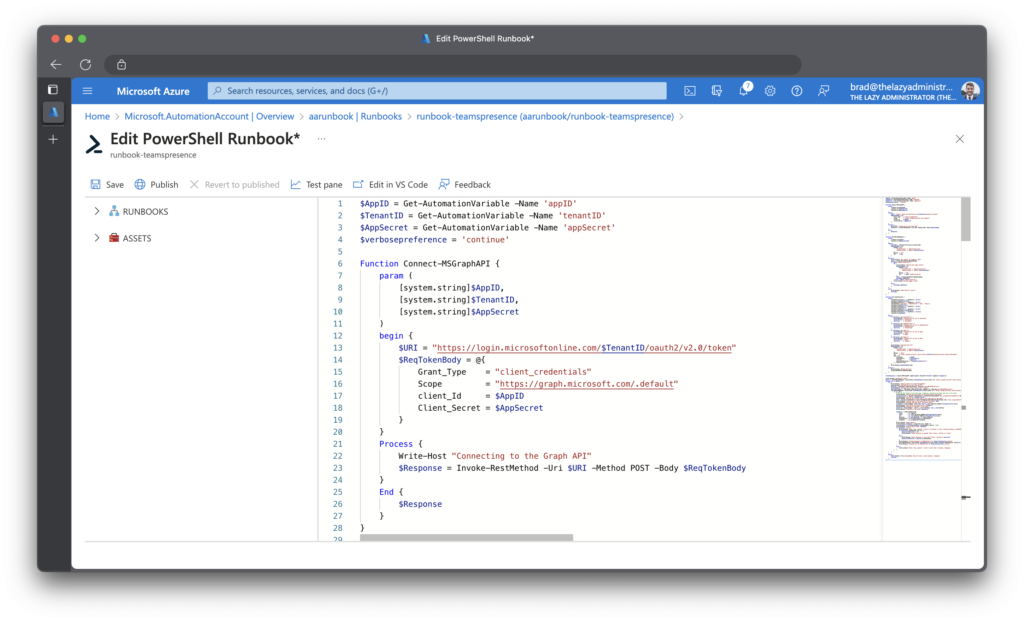
The runbook uses the following code to obtain the encrypted secrets at runtime:
$AppID = Get-AutomationVariable -Name 'appID'
$TenantID = Get-AutomationVariable -Name 'tenantID'
$AppSecret = Get-AutomationVariable -Name 'appSecret'
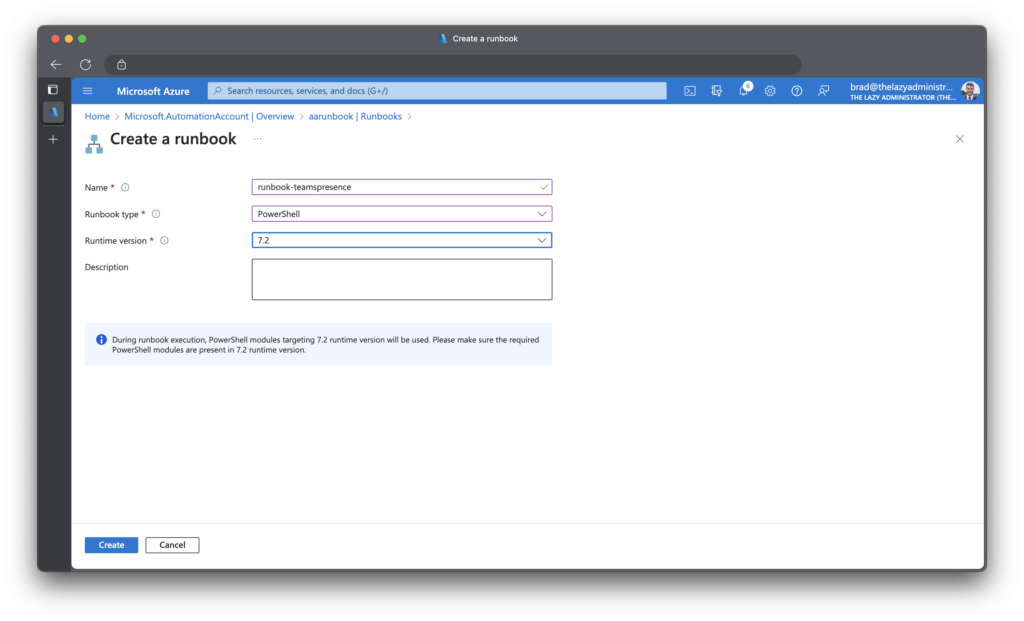
Next, we need to create the runbook
Next, paste over the runbook code from GitHub (below)
Create Runbook Schedule
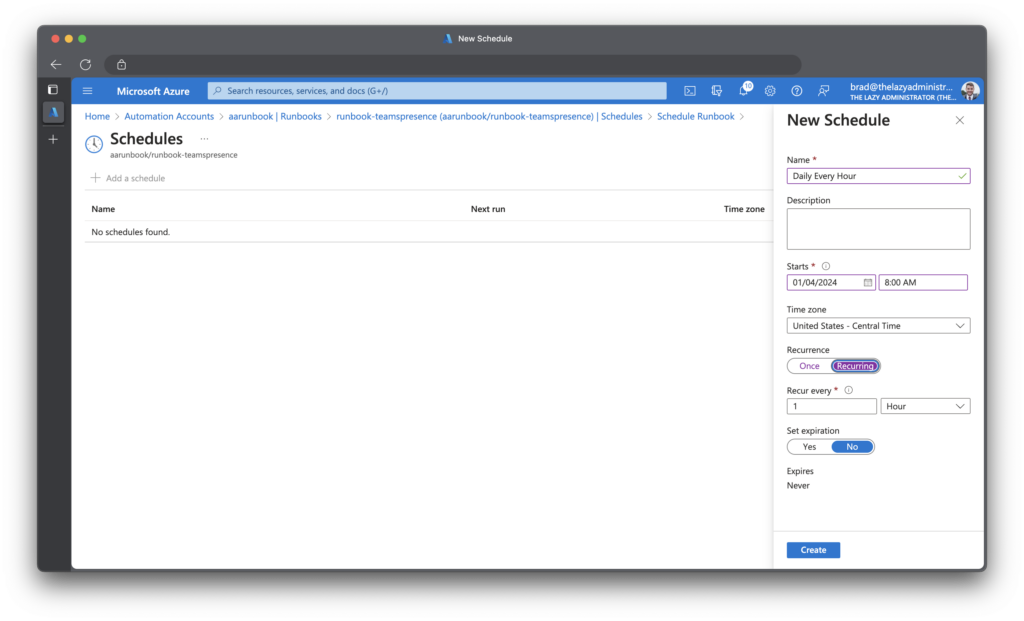
We now need to create a schedule so this runbook can run on a regular cadence. In the runbook click Schedules and then create a schedule that best fits your needs. In my example I have it running daily at 8:00 AM and running every 1 hour.
Obtain the Source Code
The source code it available on my GitHub Here. Feel free to send in issues and contribute to the project as well.

My name is Bradley Wyatt; I am a 5x Microsoft Most Valuable Professional (MVP) in Microsoft Azure and Microsoft 365. I have given talks at many different conferences, user groups, and companies throughout the United States, ranging from PowerShell to DevOps Security best practices, and I am the 2022 North American Outstanding Contribution to the Microsoft Community winner.
One thought on “Automatically Schedule Microsoft Teams Do Not Disturb Presence Based on Outlook Calendar Events”
This is great and also far too complicated for such a simple feature. If I am in a meeting, presenting or not, I need to be DND. Not having basic features like this is what makes teams suck balls so hard.