Automating Code Compliance: AI-Driven Code Style Enforcement for Pull Requests
Table of Contents
Overview
As teams increasingly rely on automation for code quality and compliance, ensuring consistent coding standards can be challenging during the pull request (PR) process. In this article, we explore how to build an AI-powered style enforcement pipeline using modern tools like GPT-4 and CI/CD workflows.
You’ll learn how to:
- Enforce best practices and team-specific coding guidelines without manual intervention.
- Integrate automated code reviews into your PR pipelines.
- Leverage AI to detect style violations, generate actionable reports, and even suggest fixes.
With this in place, you can lower the amount of time code reviews take your engineers, and even have the Pull Request be rejected until the resolutions are addressed and marked as complete.

How It Works
- We will set up a Pipeline that will be triggered upon a new Pull Request in the repository.
- If there are modified PowerShell files (ex:
.ps1, .psm1, .psd1) - Then, import the style guide
- Get modified PowerShell file content
- Send the style guide and the modified PowerShell files to Open AI with the system message:
You are a PowerShell code review assistant. Review code against the provided style guide. For each violation, provide both the issue and a suggested fix using code examples. Return "NO_VIOLATIONS" if no issues found. Always include a count of total violations found at the start of your response.- The User Message is as follows (the variable
$styleguidecontains the code styling rules. The$filecontentcontains the modified PowerShell files):
Style Guide:
$StyleGuide

PowerShell Code to Review:
$FileContent

Review this PowerShell code against the style guide. Structure your response as follows:

1. Start with "VIOLATION_COUNT:[number]" on its own line
2. Then for each violation:
   - Use the format "### Violation XX - [Category] - [Brief Description]" where XX is the zero-padded number (01, 02, etc.)
   - Under each violation header:
     * Show the current code in a powershell code block
     * Show the suggested fix in a powershell code block
     * Explain why this improves compliance with the style guide

Format each violation consistently following this template:

### Violation XX - [Category] - [Brief Description]
**Current Code:**
\`\`\`powershell
# Problem code here
\`\`\`

**Suggested Fix:**
\`\`\`powershell
# Fixed code here
\`\`\`

**Explanation:** Why this change improves style guide compliance.

If no violations exist, respond with NO_VIOLATIONS.- If violations are found, it creates individual comments on the Pull Request for each violation, creates an overview comment showing the total files checked, number of violations per file, and the total amount of violations. A markdown report is also exported and saved to the build artifacts directory and the pipeline will exit with error code 1 – failing the pipeline.
- If no violations are found it will generate a simple ‘all clear’ report and success message and exit the pipeline with code 0 – passing the pipeline.
Prerequisites
- Azure DevOps
- OpenAI API Access
- Access to the project files on GitHub
Setup and Configuration
In this article, I will walk you through setting up an automated code-compliance checker for PowerShell, but you can apply it to any language you’d like.
Creating the Repository
I will start with a blank Azure DevOps Repository, but you can use an existing repository if you’d like.
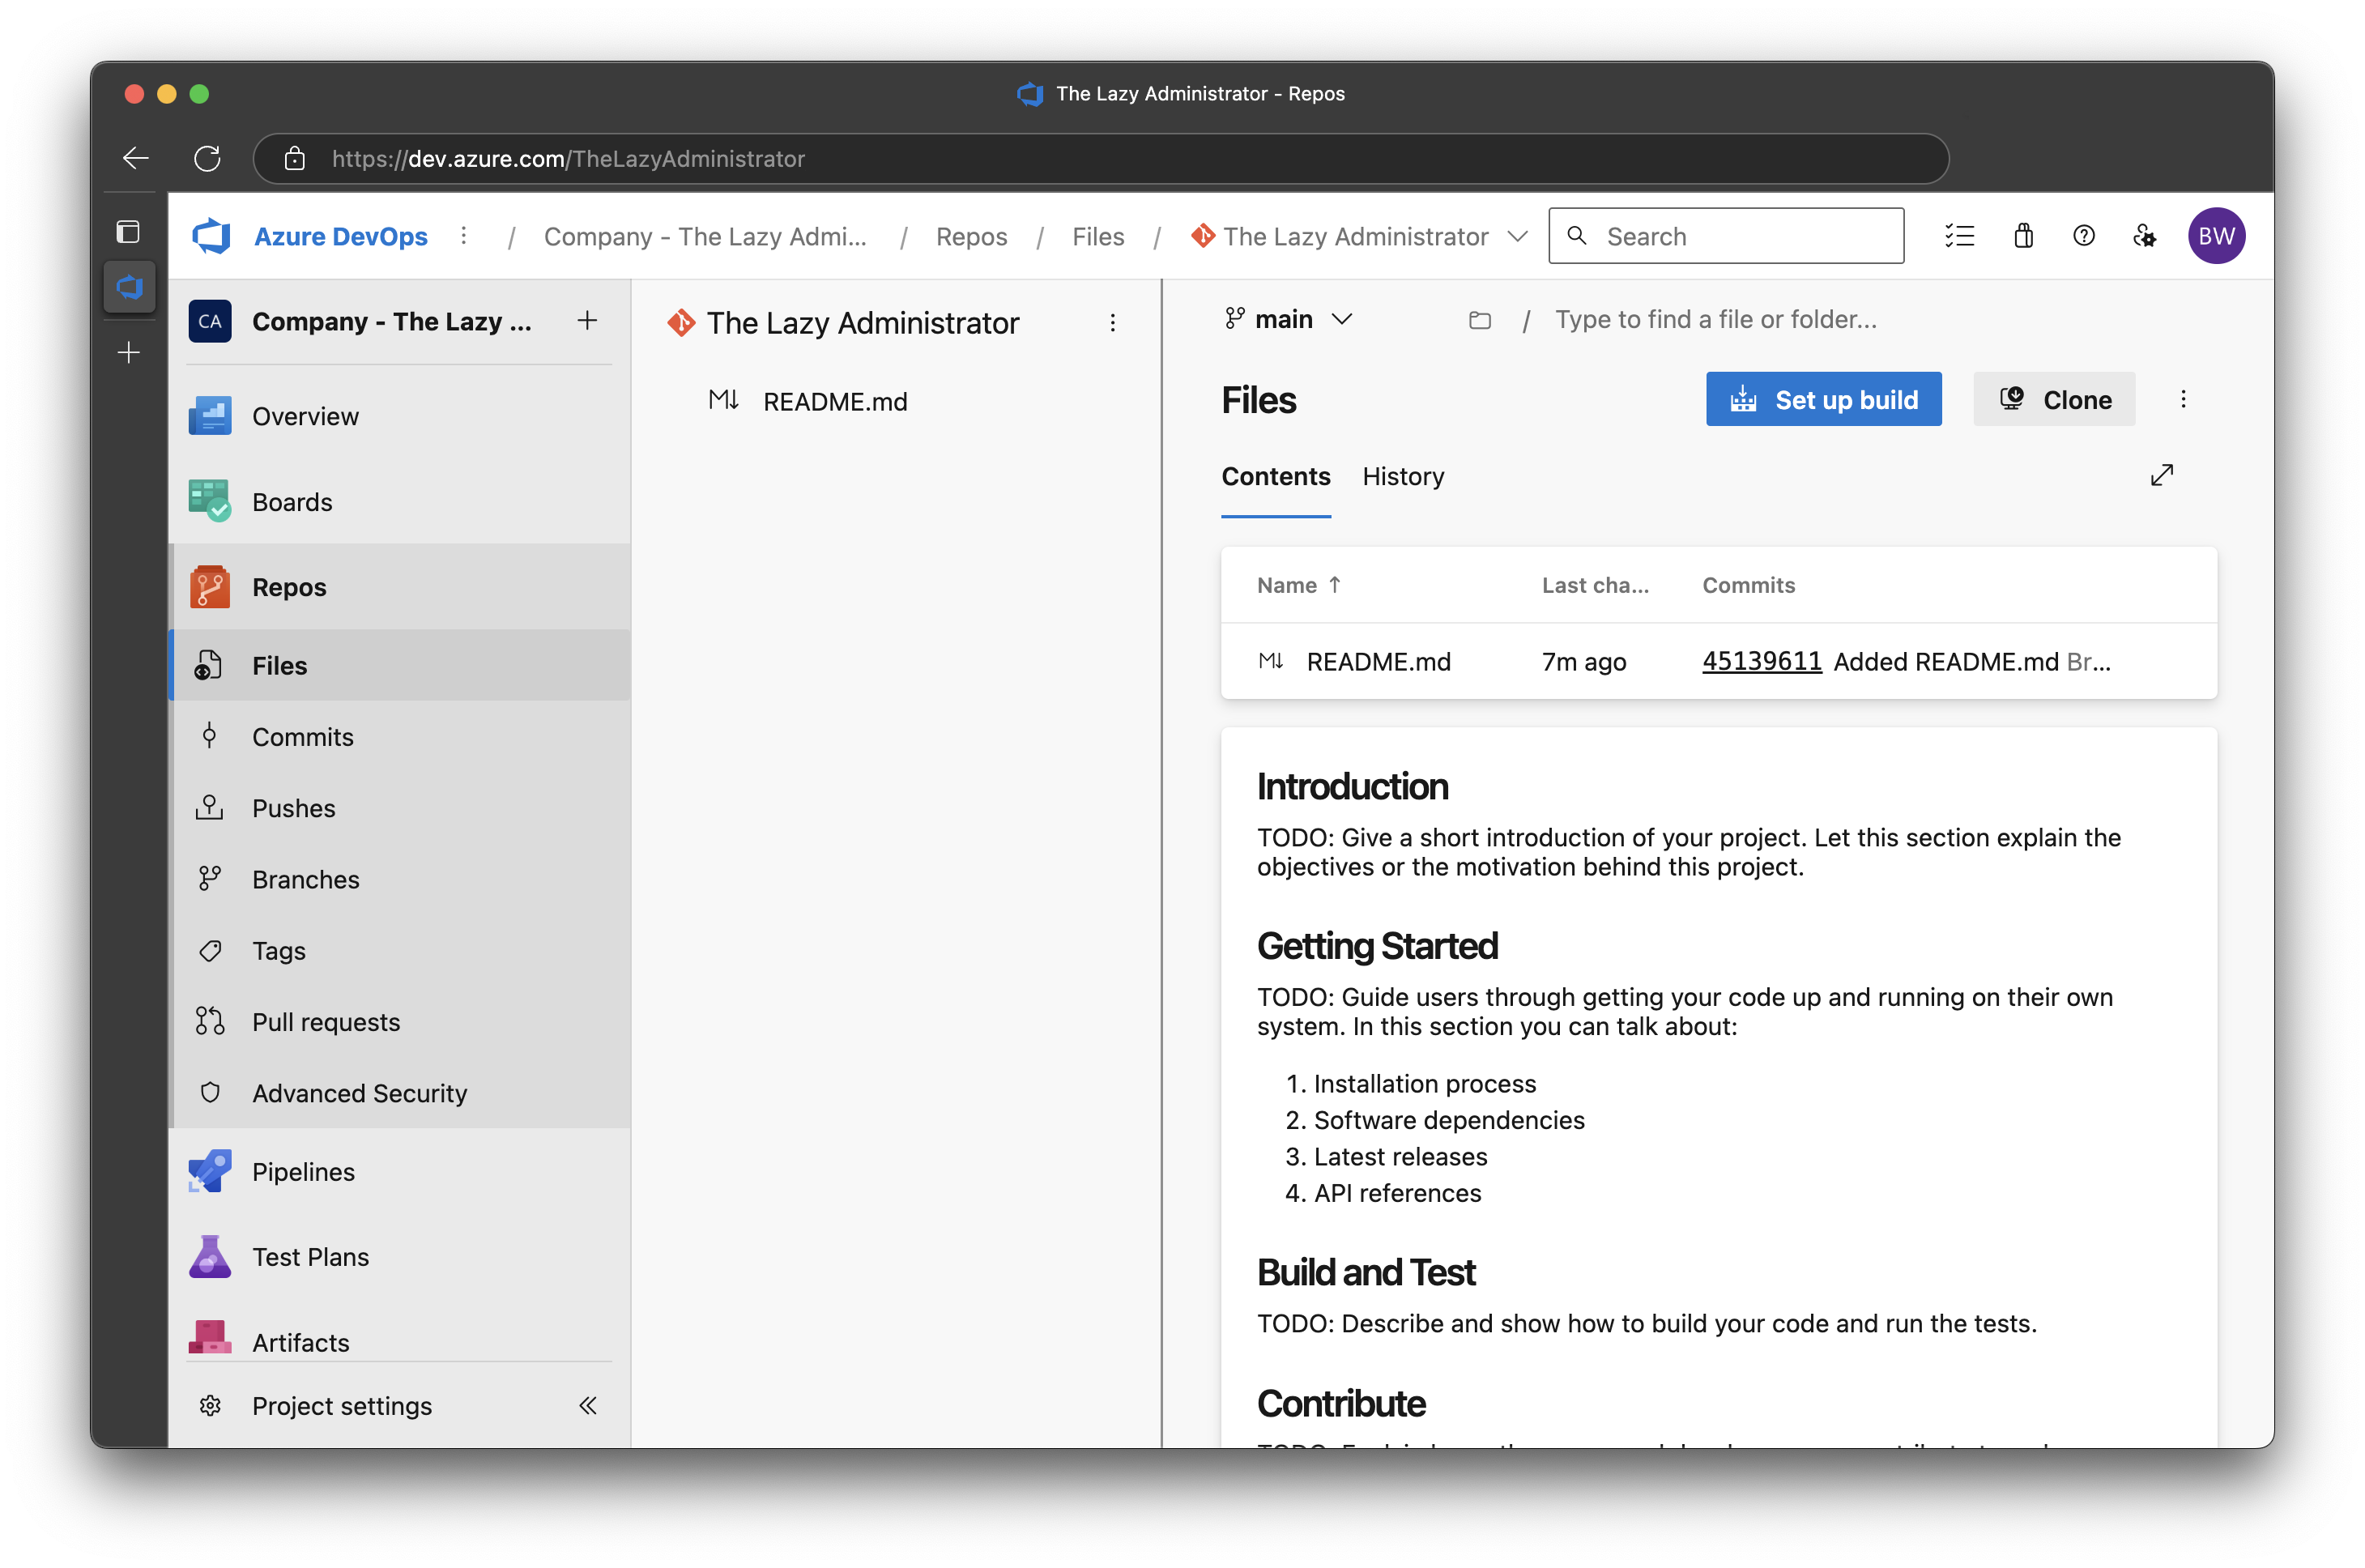
Let’s create a folder called Tests in the root of the repository. This will store our styling guide as well as the script that the pipeline will run. Within this Tests folder we need two files – for now, they can be blank; we will populate them in a later step:
Check_Styling.ps1PowerShell_StylingGuide.Json
While you do not need to configure your styling guide as a
JSONfile, I have found that A.I. does a better job when you provide it as aJSONfile.
Creating Your Styling Guide
For PowerShell, I based my styling guide from the Powershell Practice and Style Guide. While I did not copy over everything, because the guide is quite expansive, I copied of rules and stylings that I felt were most important. You can view a markdown document of the styling rules I chose here.
In order to convert my rules to a JSON file that I could feed A.I. I used Claude and gave it my rules and asked for it to generate a JSON file that included the rule, example, and the rules topic. You can view and use my JSON styling guide here. Once you have created your styling guide file, place it in the Tests folder you created earlier.
Create the Check Styling Script
Next, we need to create a script that our pipeline will call that will gather up our modified files, our styling guide, Open AI API key and send it off. You can find my script here. This file should be placed in your Tests folder. My script contains two functions:
Send-StyleCheckRequestAdd-PullRequestComment
TheSend-StyleCheckRequestfunction gathers the style guide and the file content for all the changed files and sends it to Open AI with the prompt from above. It returns the AI’s response.
The Add-PullRequestComment function creates a comment on the pull request for each violation found. This enables the engineer to see each issue and resolve it.
Create the YAML Pipeline
Next, we need to create the YAML pipeline file that will contain the instructions for our pipeline. Mine can be found here. This file should be placed in the repository root. In my example, I am doing the following:
Trigger
Only trigger on pull requests to the main branch if PowerShell files have been modified:
pr:  # Only trigger on pull requests
  branches:
    include:
      - main
  paths:
    include:
      - '**/*.ps1'
      - '**/*.psm1'
      - '**/*.psd1'
Get Modified Files
After we checkout the repository, our next step is to get modified PowerShell files. We then write that to the build artifact staging directory as modifiedFiles.json. If there are no modified files found, it will exit with code 0.
- task: PowerShell@2
  displayName: GetModifiedFiles
  inputs:
    targetType: 'inline'
    script: |
      Write-Host "Debug: Starting GetModifiedFiles"
      Write-Host "Debug: Current directory is $(Get-Location)"
      Write-Host "Debug: Build.Reason is $env:BUILD_REASON"
      Write-Host "Debug: System.PullRequest.SourceBranch is $env:SYSTEM_PULLREQUEST_SOURCEBRANCH"
      Write-Host "Debug: System.PullRequest.TargetBranch is $env:SYSTEM_PULLREQUEST_TARGETBRANCH"
      Write-Host "Debug: Build.SourceBranch is $env:BUILD_SOURCEBRANCH"

      # Check if we're in a PR
      if ($env:BUILD_REASON -ne "PullRequest") {
          Write-Host "Not running in PR context. Pipeline should only run for PRs."
          exit 0
      }

      # Clean the branch names
      $targetBranch = $env:SYSTEM_PULLREQUEST_TARGETBRANCH -replace '^refs/heads/', ''
      Write-Host "Target branch (cleaned): $targetBranch"

      # Ensure we have the latest code
      Write-Host "Fetching latest code..."
      git fetch origin $targetBranch
      if ($LASTEXITCODE -ne 0) {
          Write-Error "Failed to fetch target branch"
          exit 1
      }

      # Get files changed in PR
      Write-Host "Getting files changed in PR..."
      $modifiedFiles = git diff --name-only "origin/$targetBranch" HEAD |
          Where-Object { $_ -match '\.(ps1|psm1|psd1)$' }

      Write-Host "Found PowerShell files:"
      if ($modifiedFiles) {
          $modifiedFiles | ForEach-Object { Write-Host "  $_" }
      } else {
          Write-Host "  No PowerShell files modified"
      }

      # Convert to JSON
      $modifiedFilesJson = if ($modifiedFiles) {
          $modifiedFiles | ConvertTo-Json -Compress
      } else {
          "[]"
      }

      $artifactPath = Join-Path $env:BUILD_ARTIFACTSTAGINGDIRECTORY "modifiedFiles.json"
      $modifiedFilesJson | Out-File -FilePath $artifactPath -Encoding UTF8 -Force
      Write-Host "Wrote file list to: $artifactPath"
      Write-Host "File contents:"
      Get-Content $artifactPath | Write-Host

      # Exit with success even if no files found
      exit 0
    pwsh: true
    errorActionPreference: 'stop'
Get Styling File
Once we have our modified files in hand, we need to get our styling guide to send to Open AI. Notice that the path for the styling guide is hard-coded in -StylingGuidePath so if you do not have this file in the tests directory with the same name, you will want to modify it here.
Once we have the styling file and the modified files, we will call the Check_styling.ps1 files and send over our modified files, Open AI Key, and styling guide.
- task: PowerShell@2
  displayName: CheckPowerShellStyle
  inputs:
    targetType: 'inline'
    script: |
      Write-Host "Debug: Starting CheckPowerShellStyle"
      $artifactPath = Join-Path $env:BUILD_ARTIFACTSTAGINGDIRECTORY "modifiedFiles.json"
      Write-Host "Looking for file at: $artifactPath"
      Write-Host "File exists: $(Test-Path $artifactPath)"

      if (Test-Path $artifactPath) {
          $modifiedFiles = Get-Content -Raw $artifactPath
          Write-Host "File content found: $modifiedFiles"
          try {
              & "$(System.DefaultWorkingDirectory)/tests/Check_Styling.ps1" `
                  -StylingGuidePath "$(System.DefaultWorkingDirectory)/tests/PowerShell_StylingGuide.json" `
                  -ModifiedFiles $modifiedFiles `
                  -OpenAIKey "$(OpenAIKey)"
          }
          catch {
              if ($_.Exception.Message -like "*Style guide violations found*") {
                  Write-Host "##vso[task.logissue type=error]Style guide violations found. See report for details."
                  exit 1
              }
              throw
          }
      } else {
          Write-Error "Modified files list not found at expected location"
      }
    pwsh: true
  env:
    SYSTEM_ACCESSTOKEN: $(System.AccessToken)
Publish Artifacts
Lastly, after we get a response from Open AI, we will publish the style report as an artifact on the pipeline. It will only publish if the previous step failed, meaning one or more violations were found.
- task: PublishPipelineArtifact@1
  condition: failed()  # Only publish if previous steps failed (meaning violations were found)
  continueOnError: true  # Don't fail the build if publishing fails
  inputs:
    targetPath: '$(Build.ArtifactStagingDirectory)/StyleViolations.md'
    artifact: 'StyleCheckReport'
    publishLocation: 'pipeline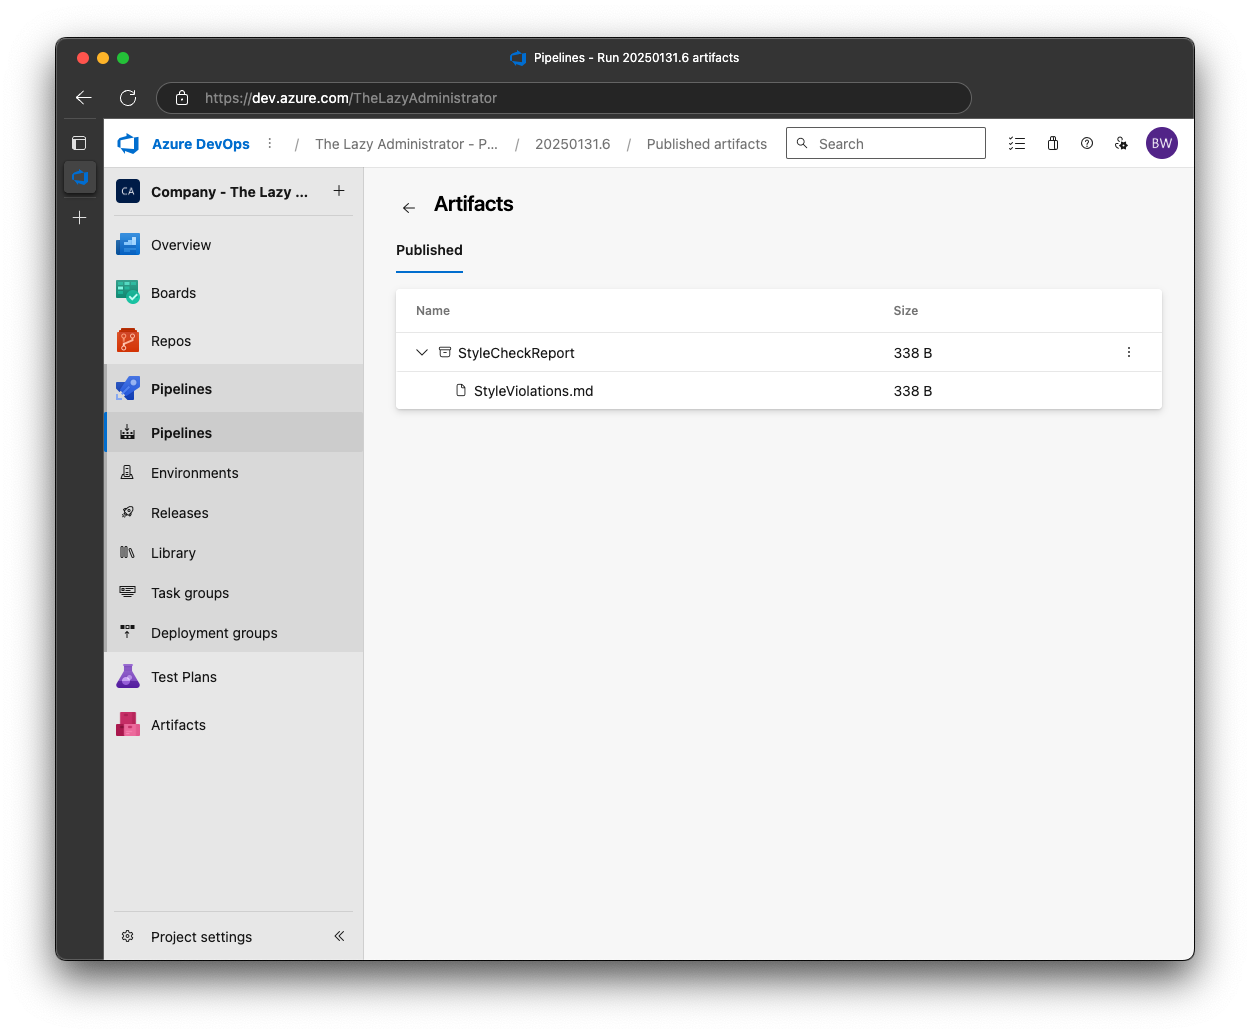
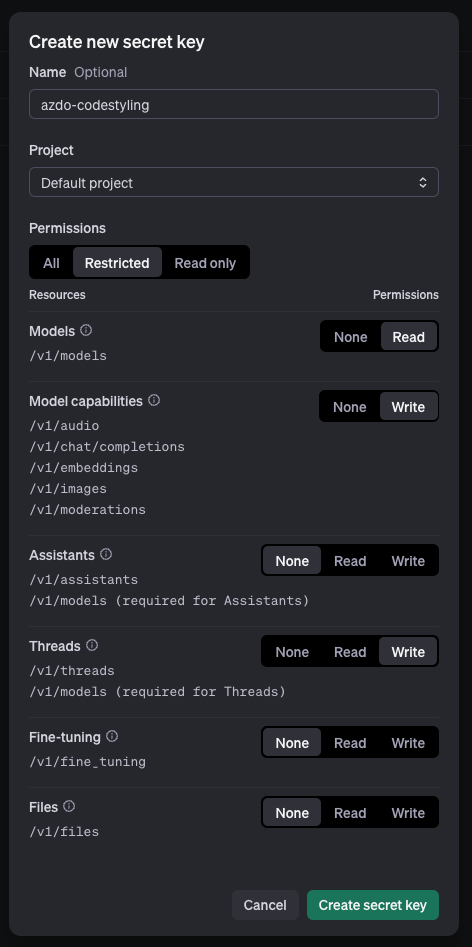
Getting your Open AI Key
Next, we need to get an Open API key. You can get your API key here. For permissions, it needs the following:
- Threads: Write
- Models: Read
- Model Capabilities: Write
Copy the key for the next step.
Adding an Variable for your Pipeline
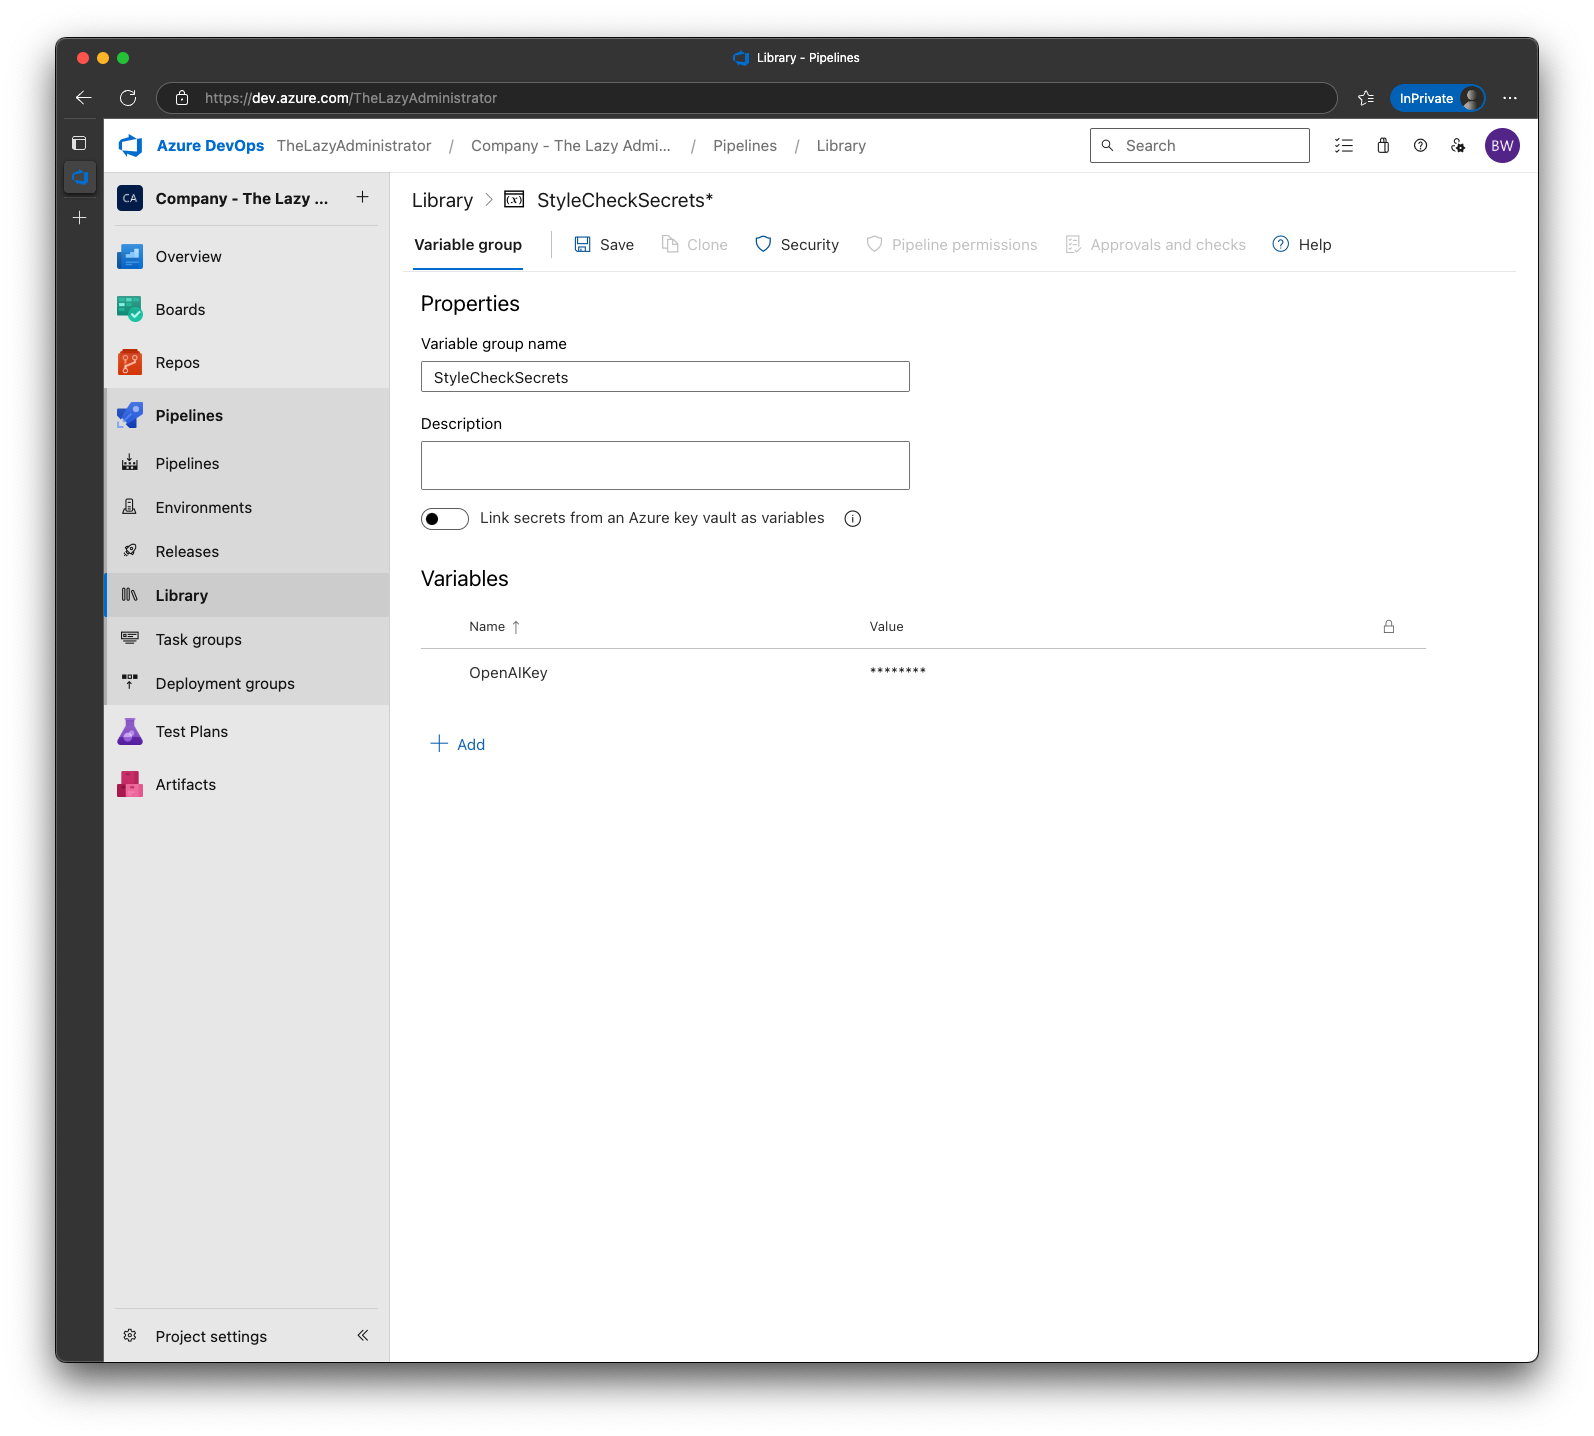
Back in Azure DevOps, go to Pipelines > Library and add a new Variable Group
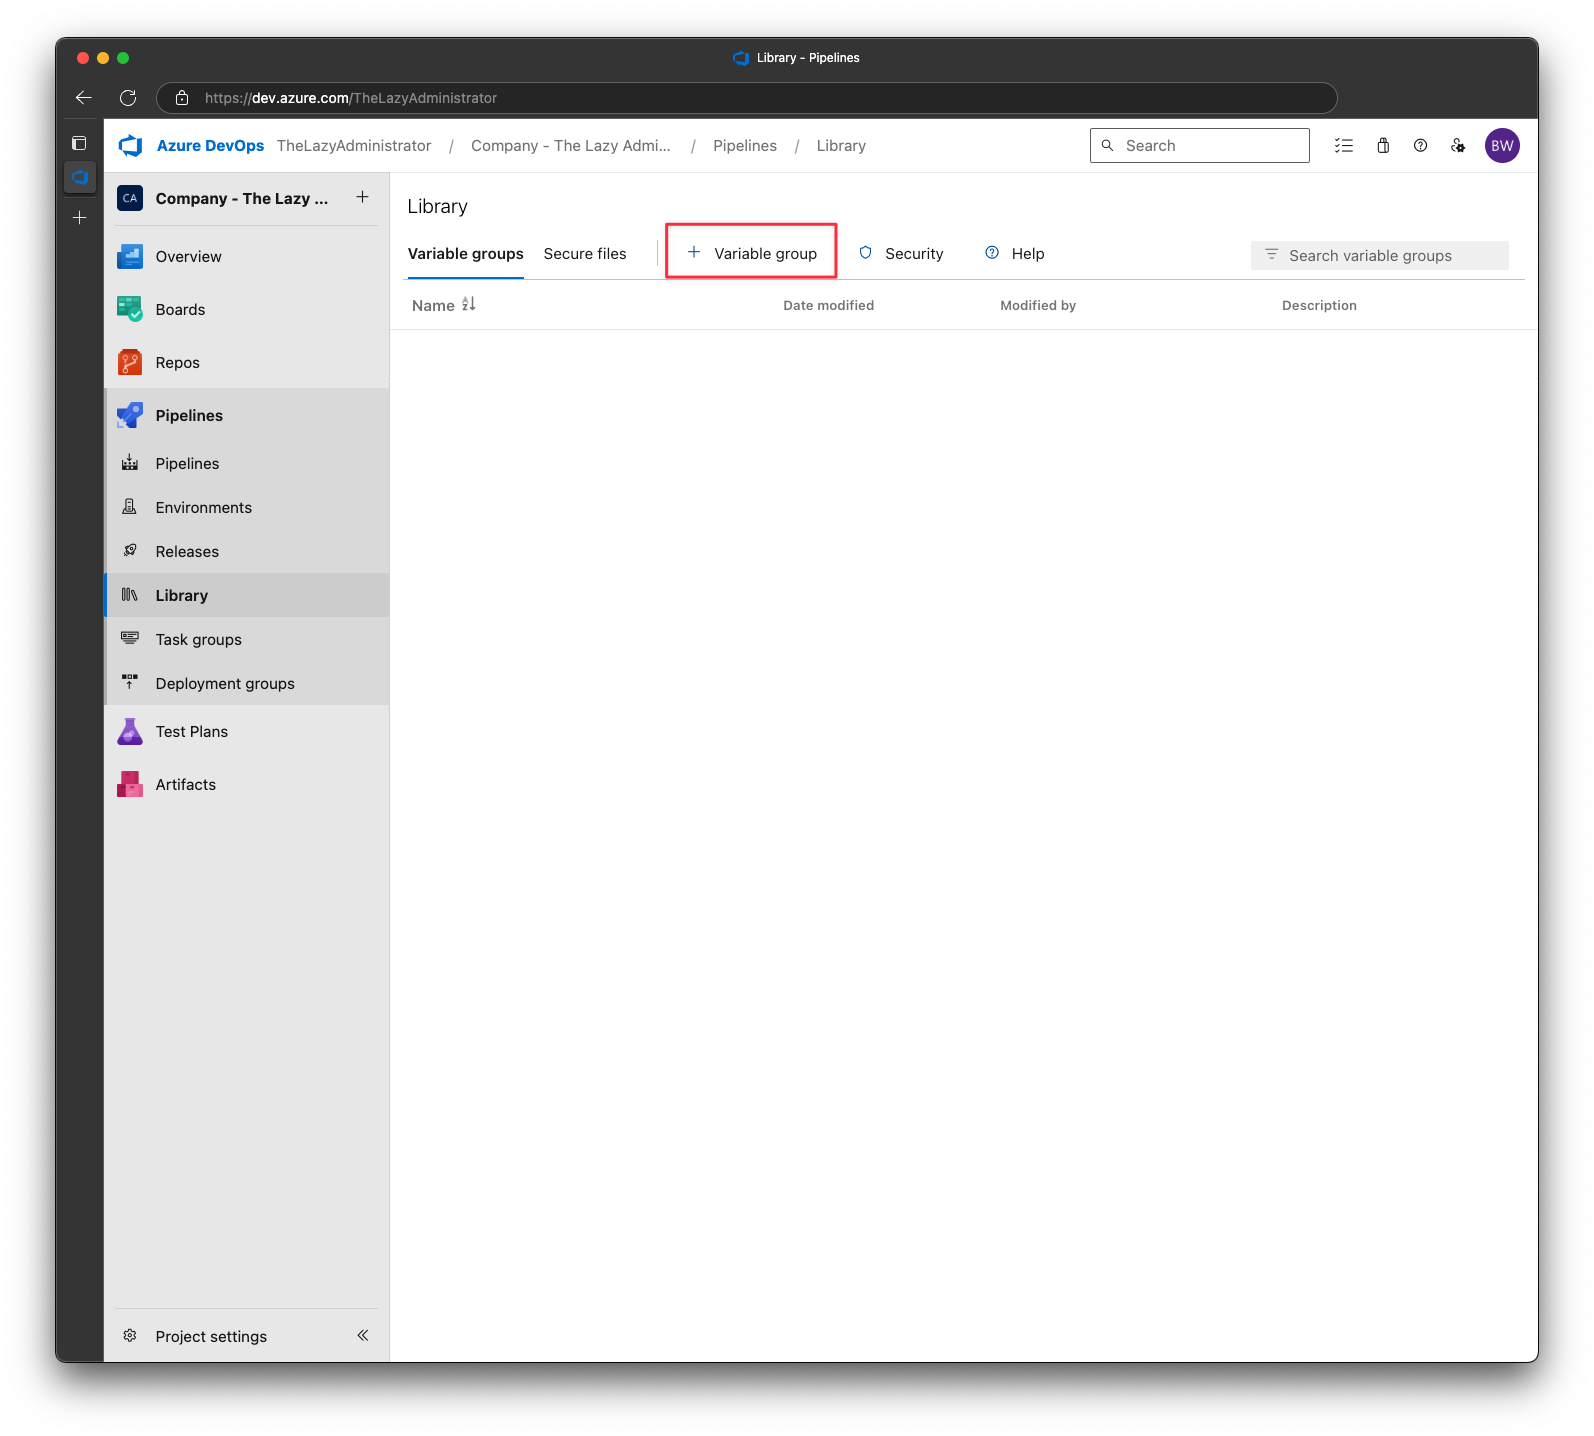
Call the variable group StyleCheckSecrets and the name of the variable is OpenAIKey. Paste your newly created key and save it.
At this point, your repository should look like the following:
├── README.md
├── powershell-style-check-pipeline.yml
└── tests
    ├── check_styling.ps1
    └── powershell_stylingguide.json
Creating the Pipeline
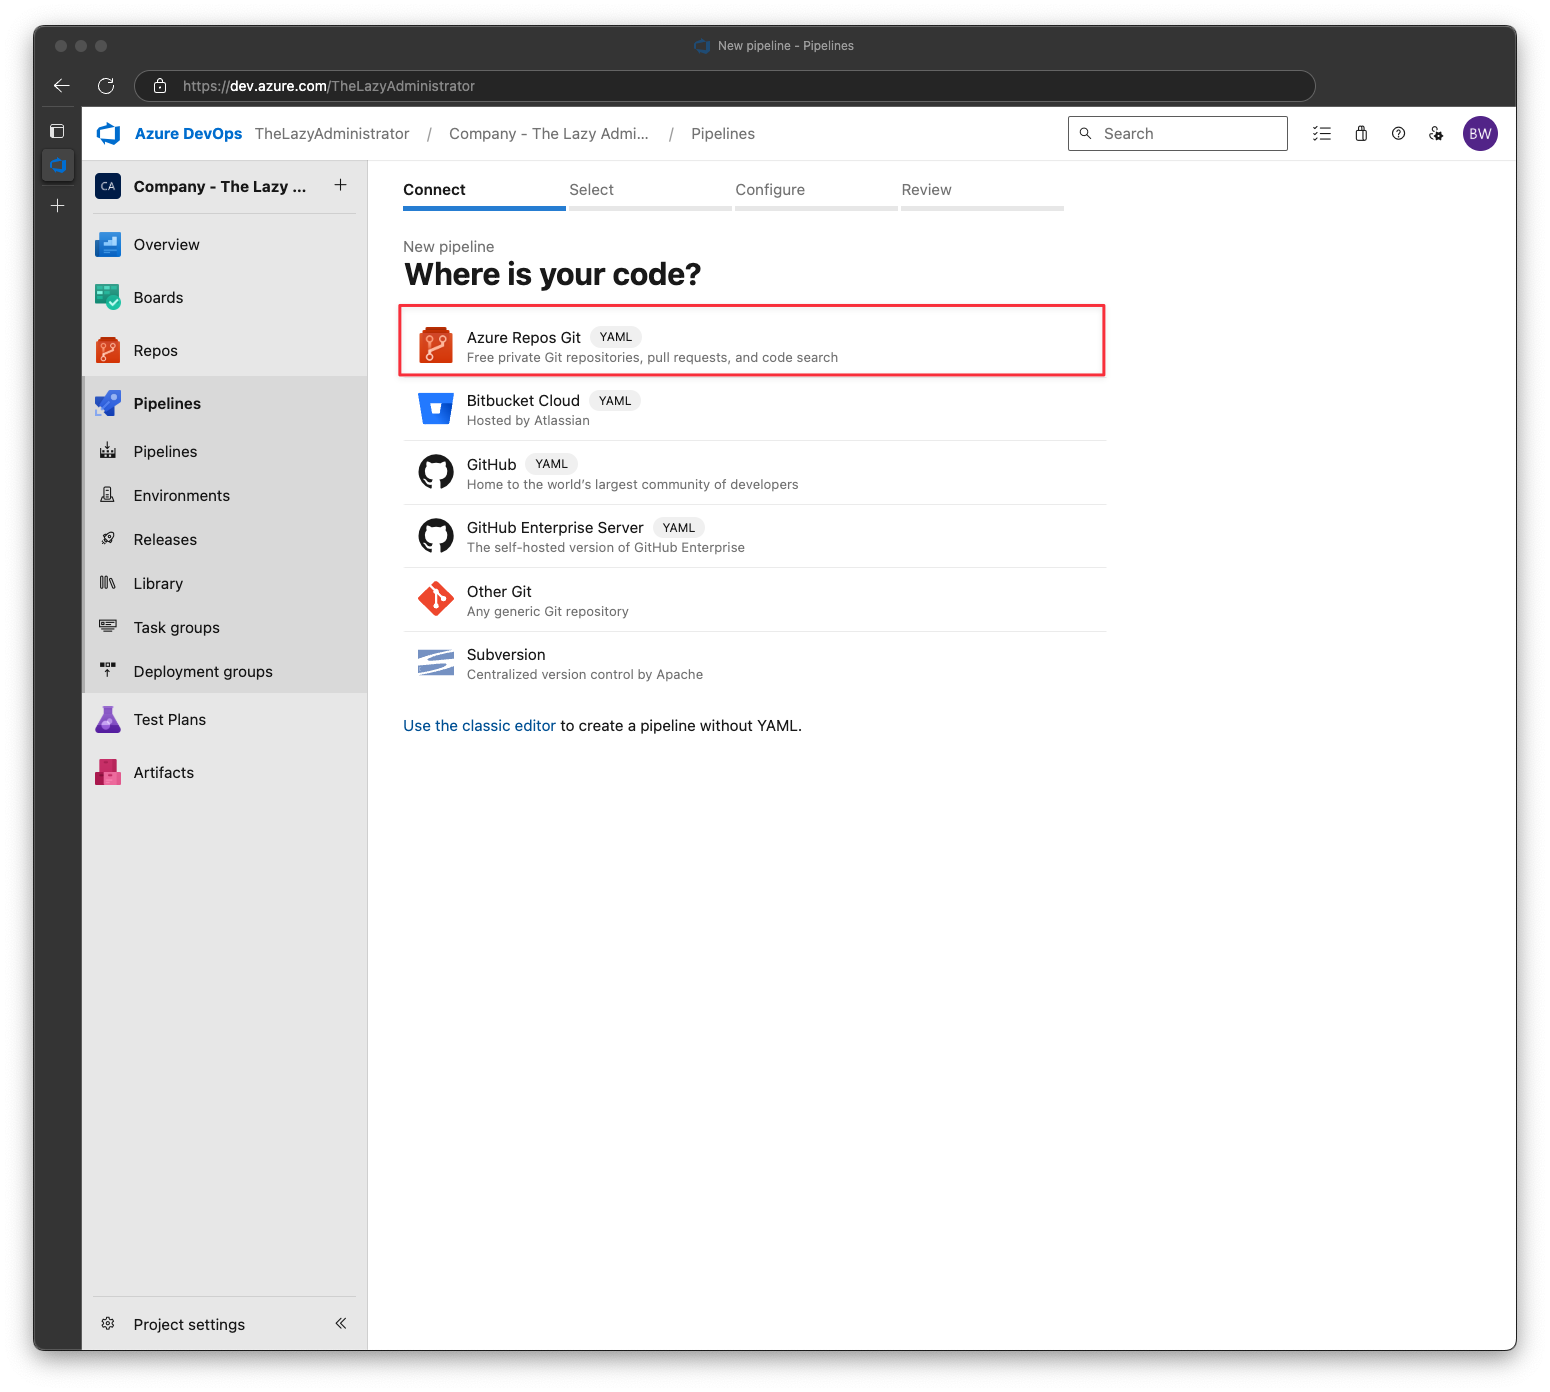
Lastly, we need to create the pipeline that will use the YAML file as its directions and the files within the tests folder. In Azure DevOps click Pipelines and then click New Pipeline.
For the section, “Where is your code?” select Azure Report Git
In the Select a repository screen, pick the repository you just added all the files to. and then click Next.
In the Configure your pipeline screen, pick “Existing Azure Pipelines YAML files”
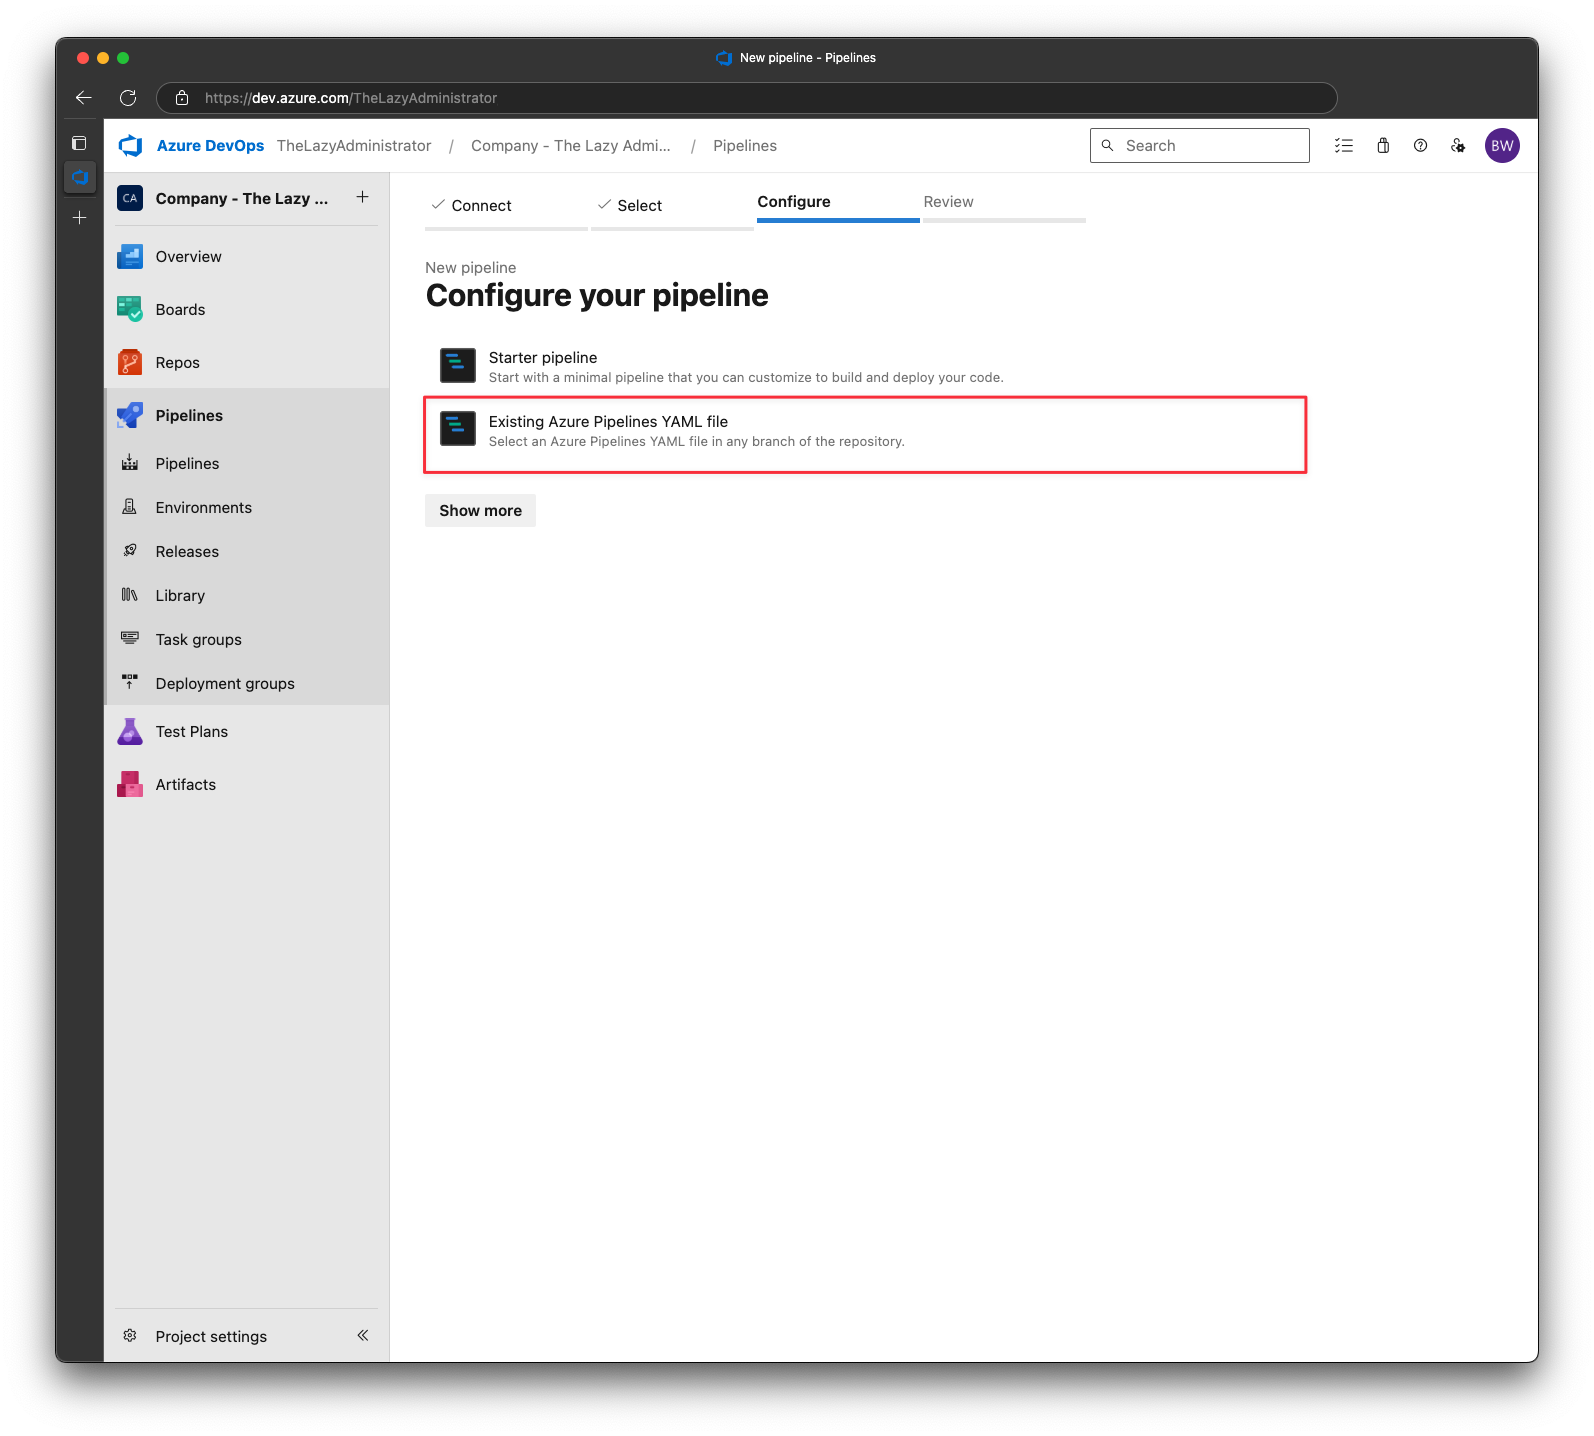
Select the powershell-style-check-pipeline.yml file from earlier and then click Continue
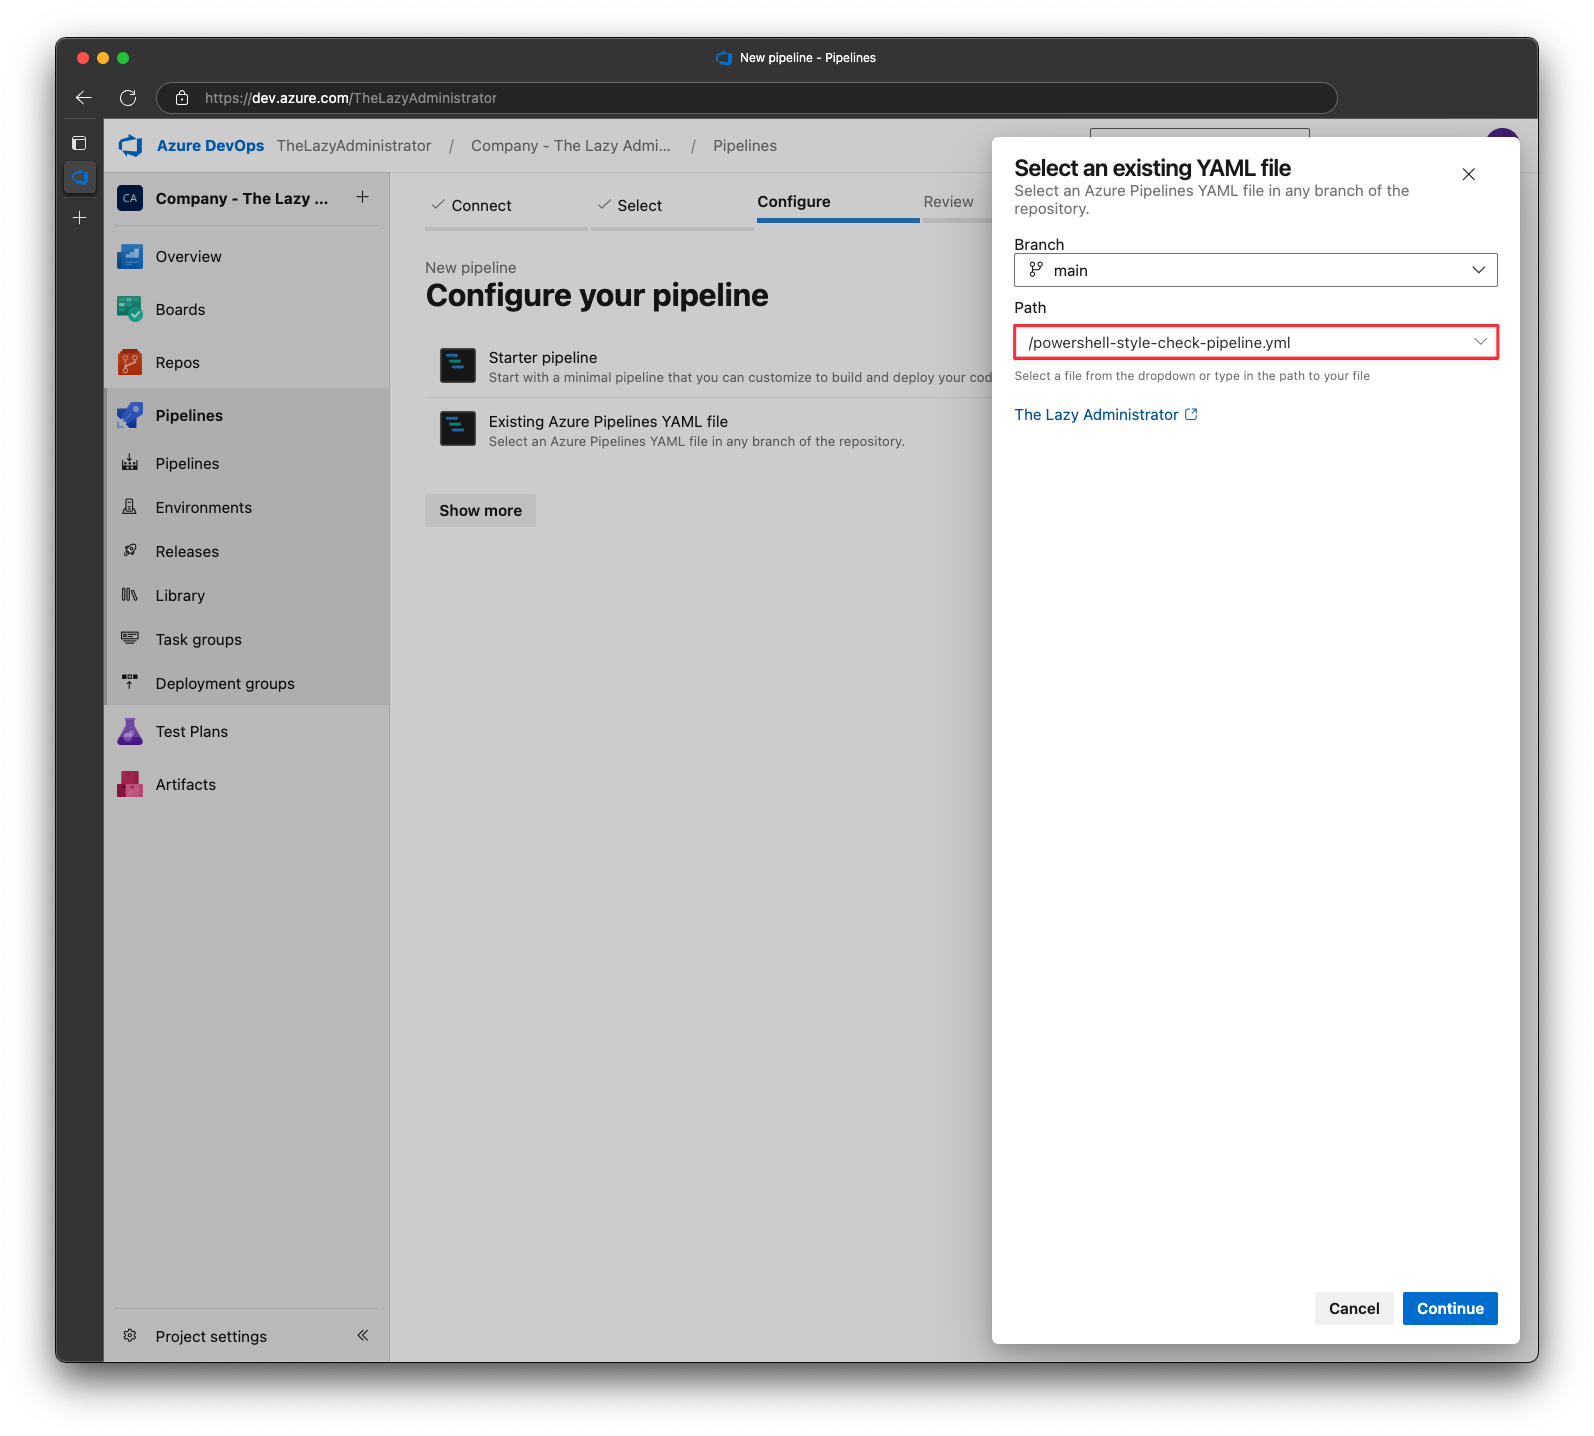
At the final screen, click Save
Feel free to go and rename the pipeline to be more descriptive. In my case I changed the name to The Lazy Administrator - PowerShell Style Check with “The Lazy Administrator” being the name of my repository.
Modify Pipeline Permissions
We need to grant our build account to contribute to Pull requests in order to write comments.
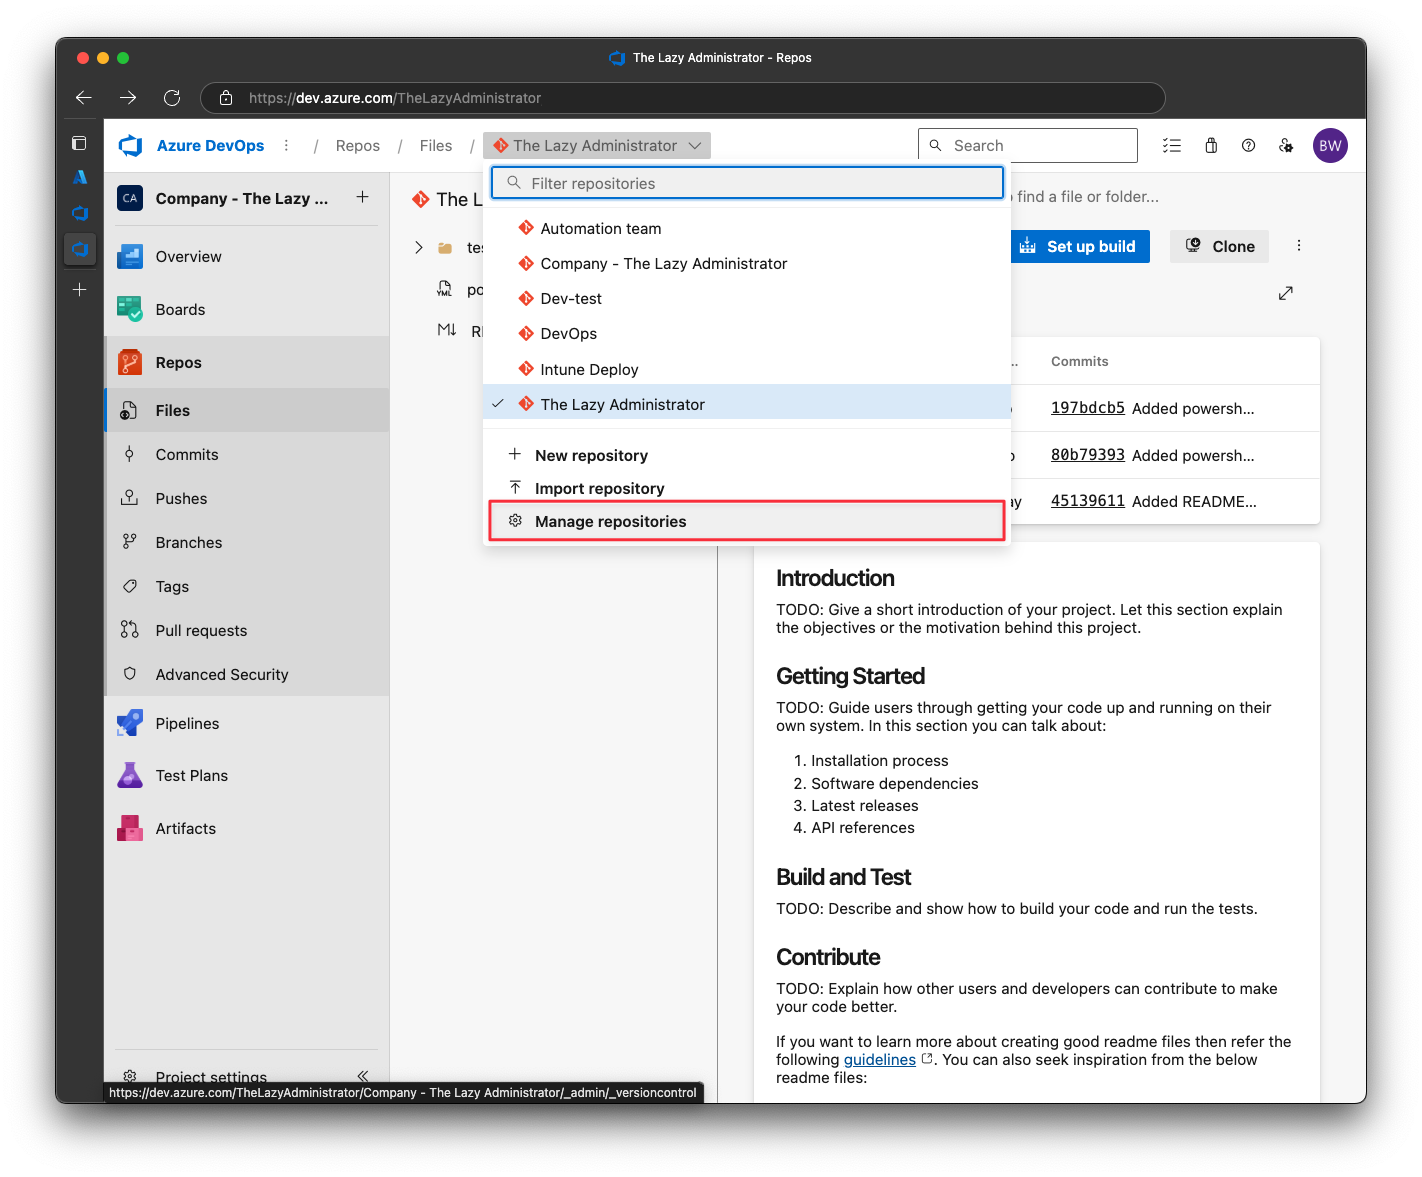
In Azure DevOps repositories, click the repositories drop-down and select Manage Repositories
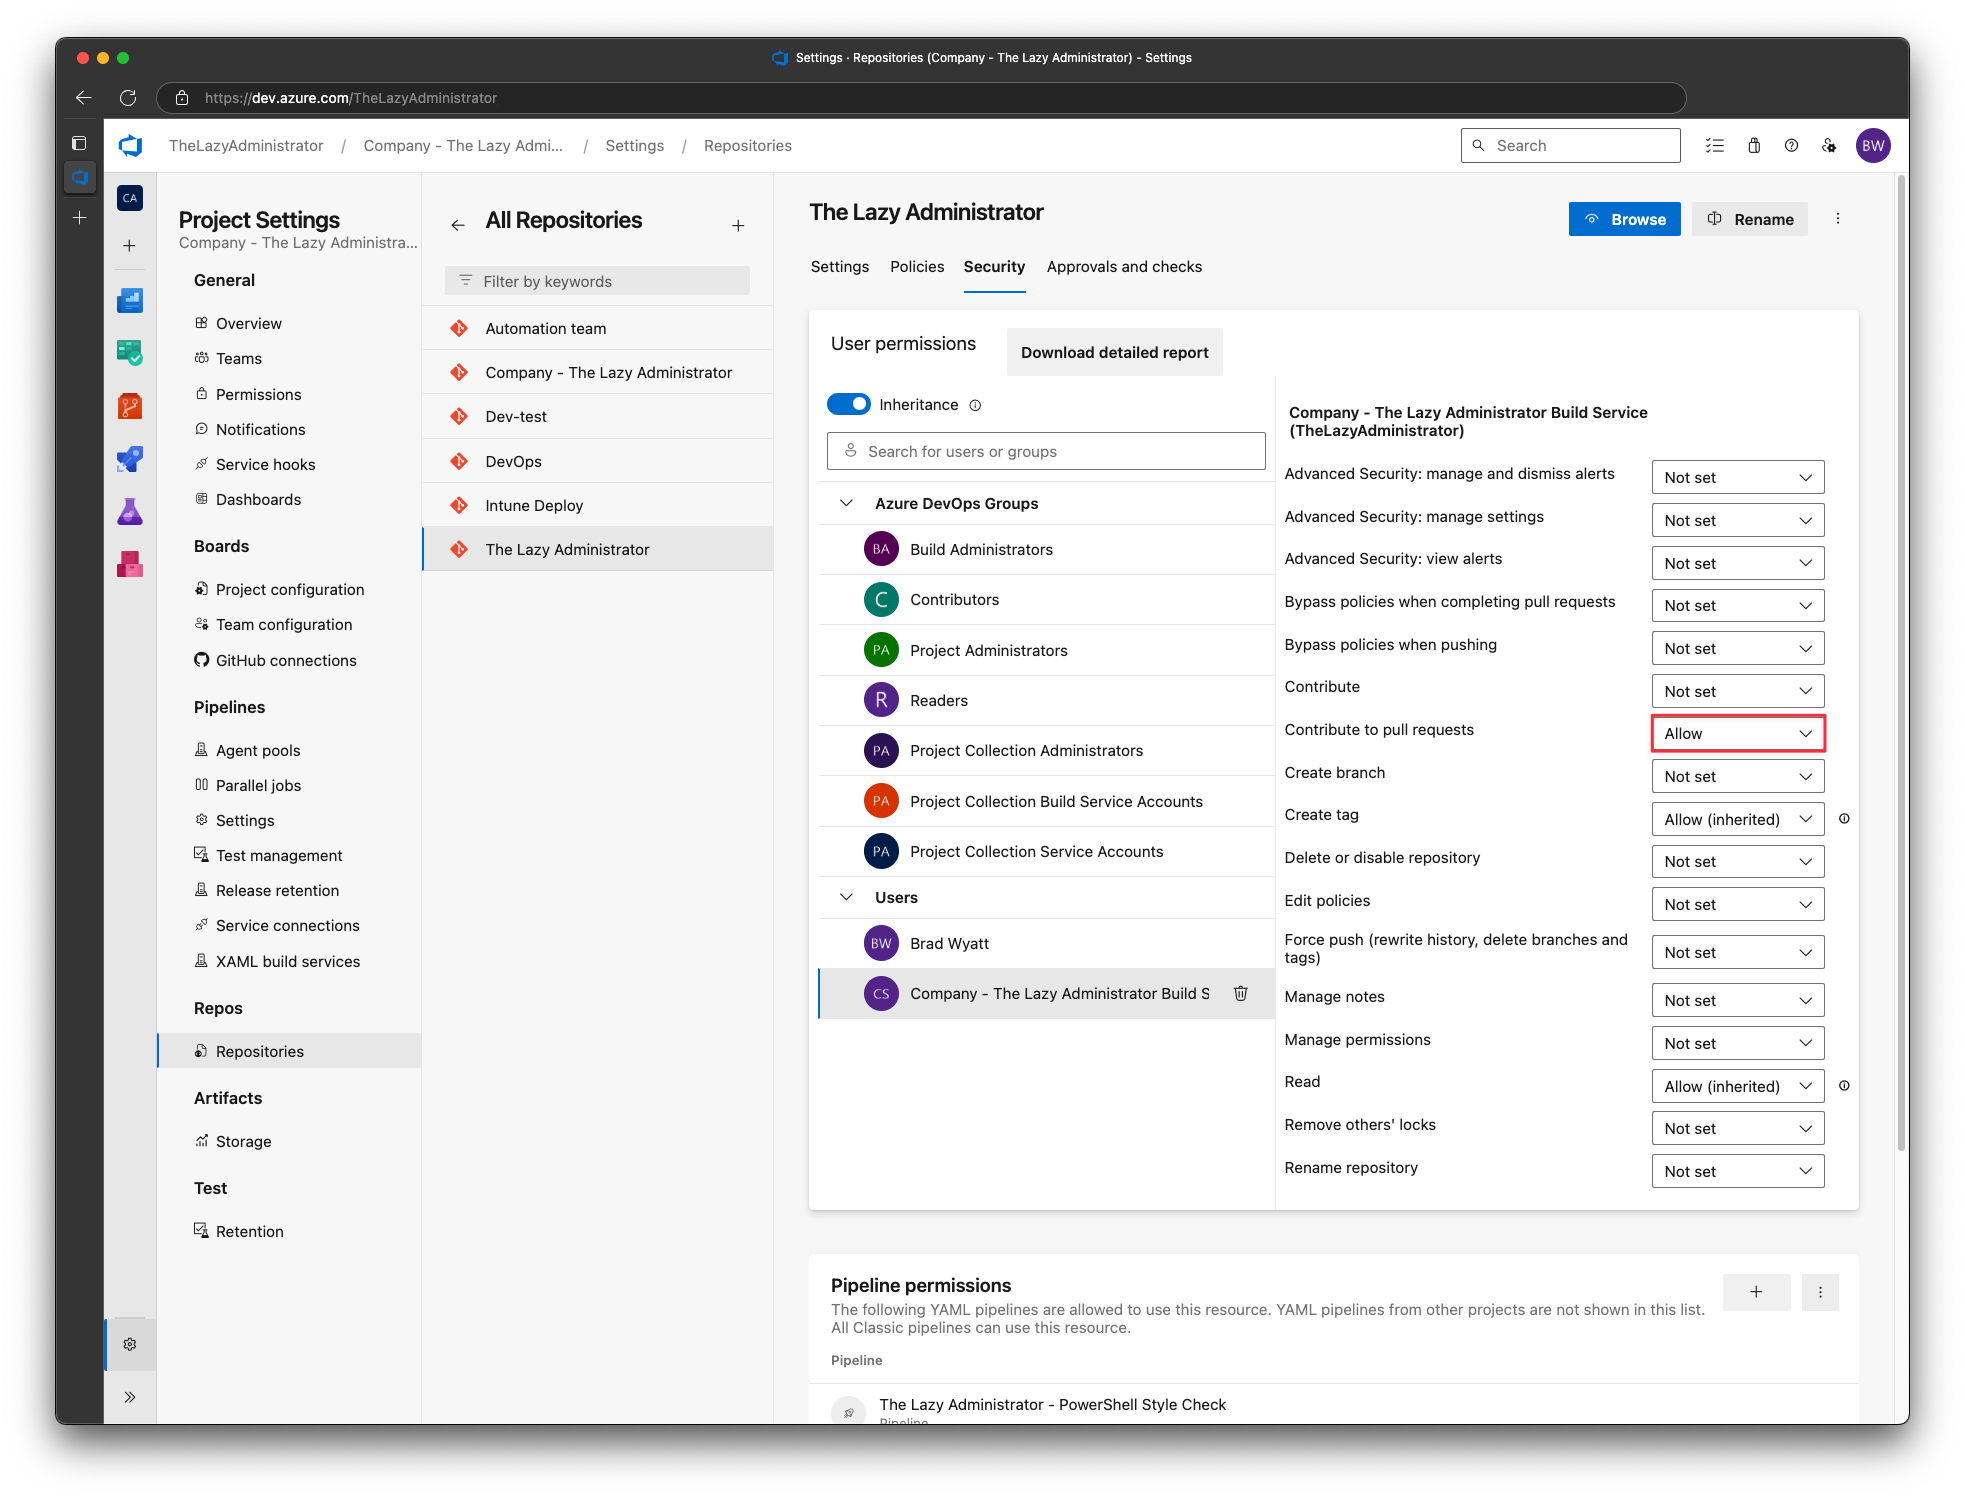
Next, click the repository and then click Security

Under Users select your build service account, and for Contribute to Pull Requests select Allow
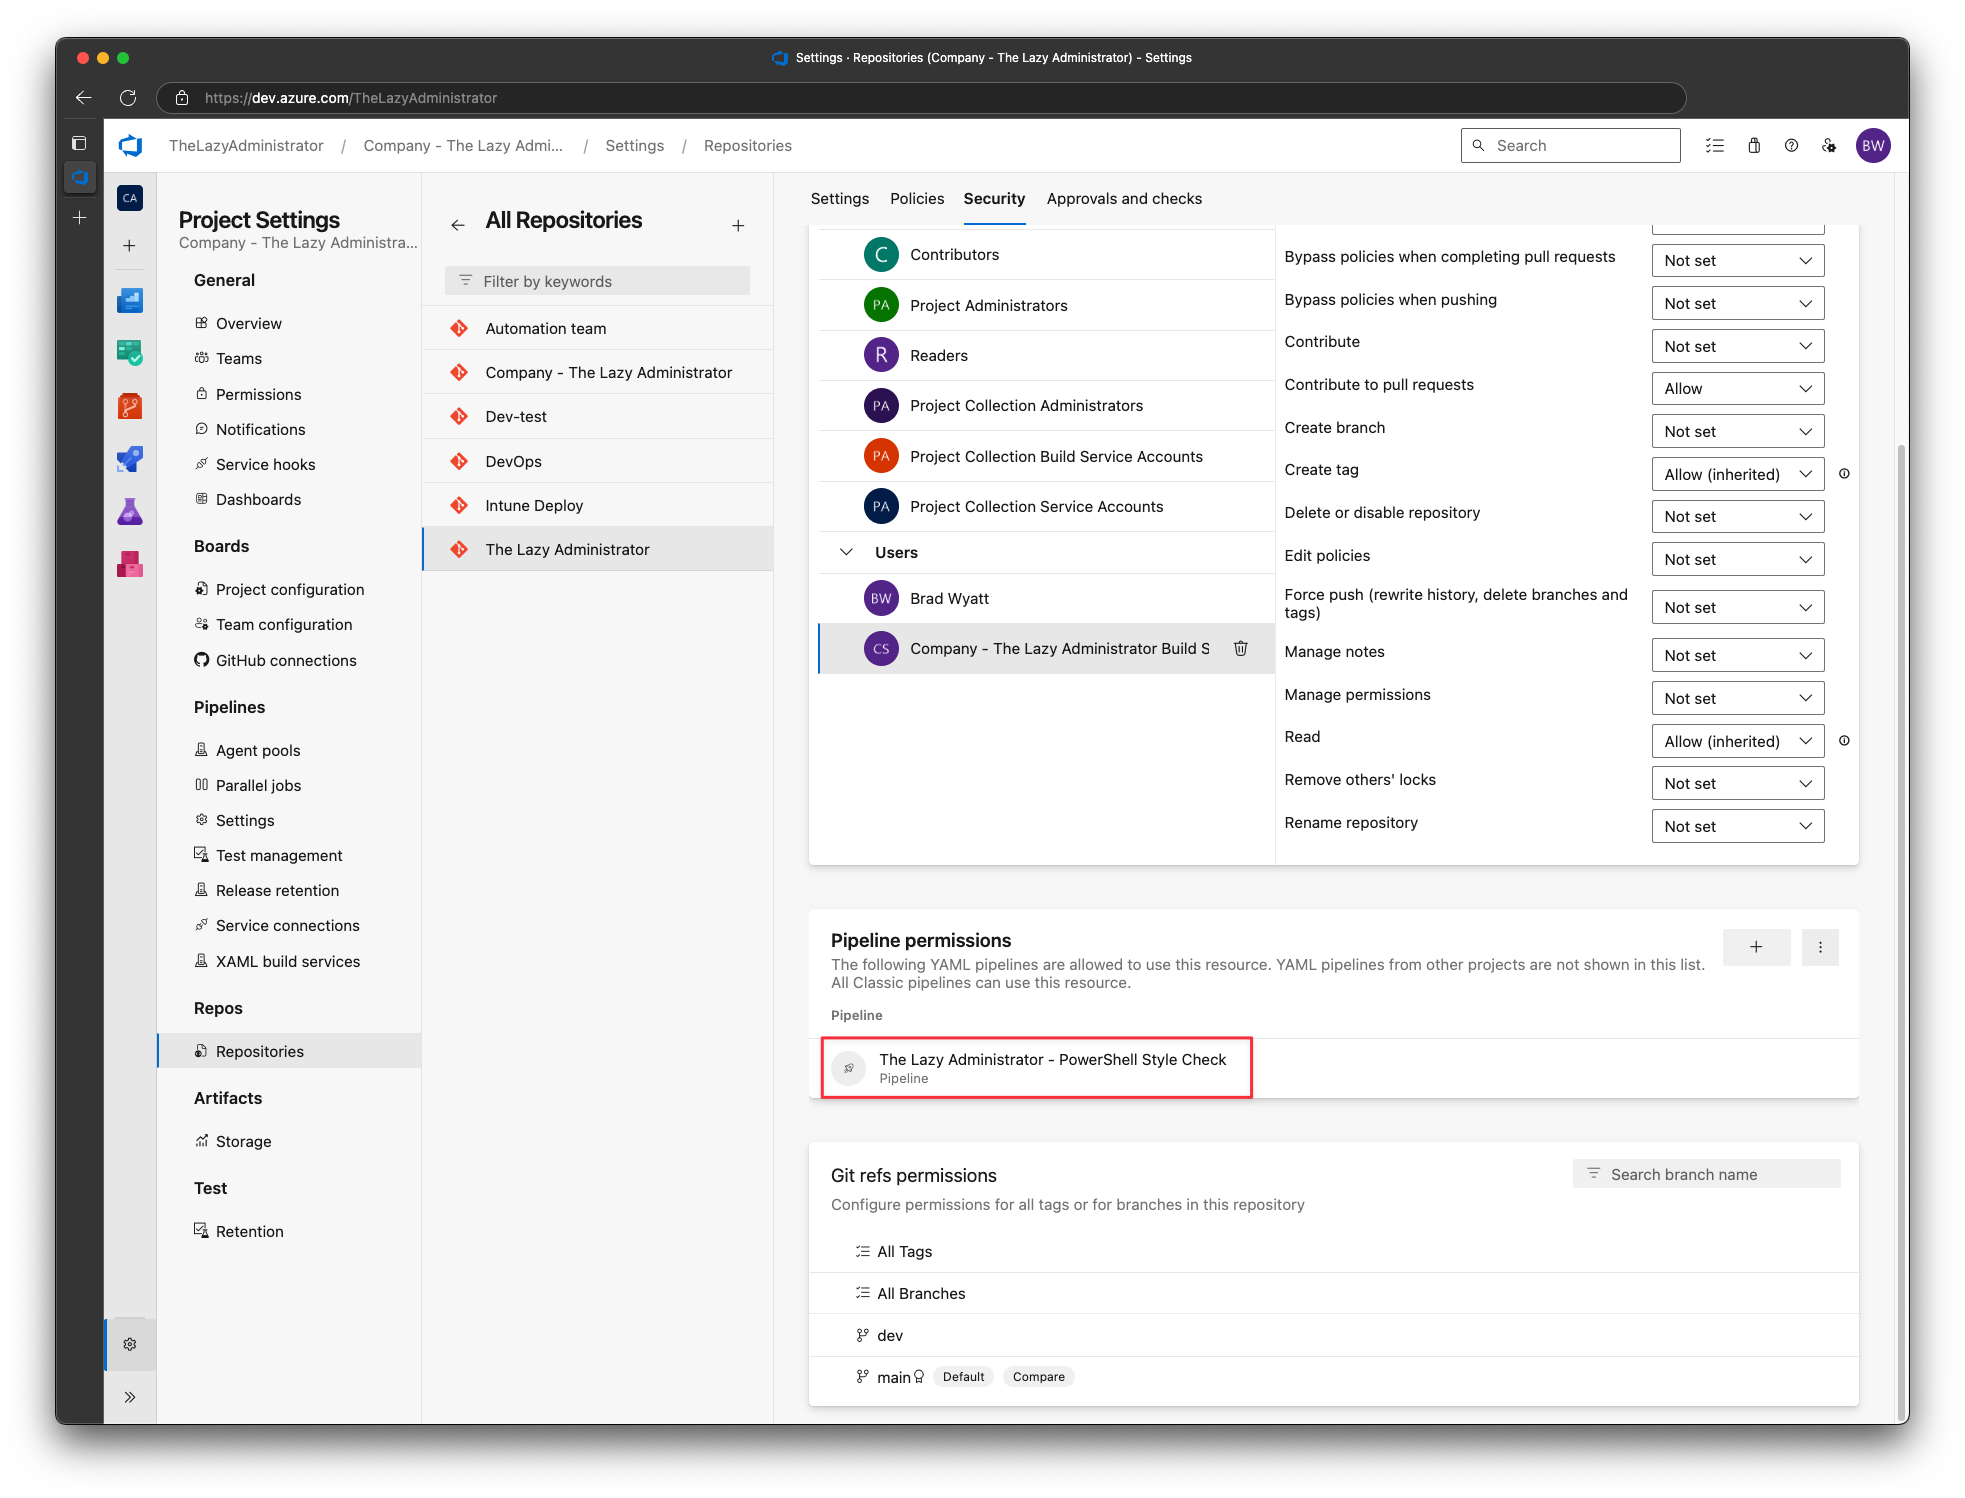
Scroll down to Pipeline permissions and add your newly created pipeline.
Enforcing Build Validation
Now that we got the pipeline up and working, we need to modify the repository policy to automatically run the pipeline and require the pipeline to pass in order for the Pull Request to be approved. In this step you can also configure it to automatically run but require the build validation as optional instead of required. This will have the pipeline run and provide you the styling feedback but you can still complete the Pull Request without resolving anything it finds.
In Azure DevOps repositories, click the repositories drop-down and select Manage Repositories

Next, click the repository and then click Policies
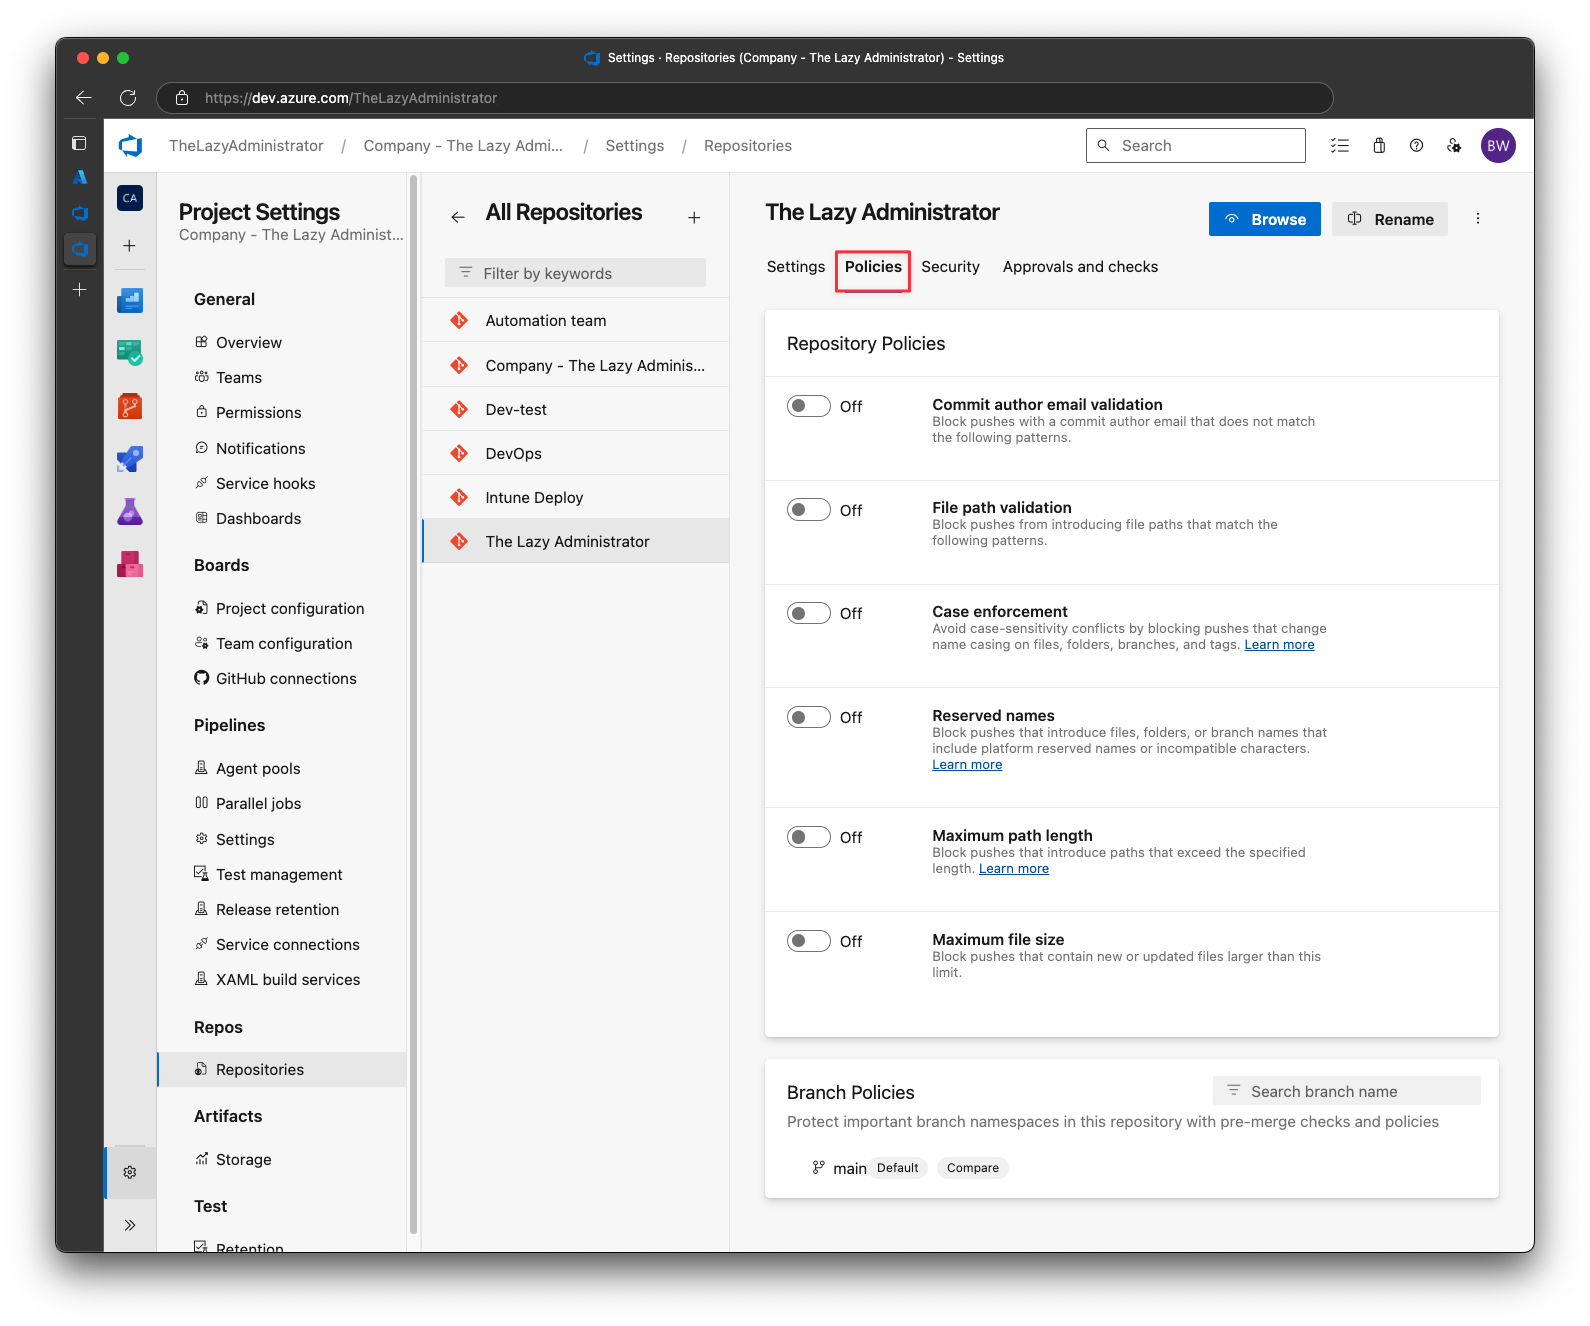
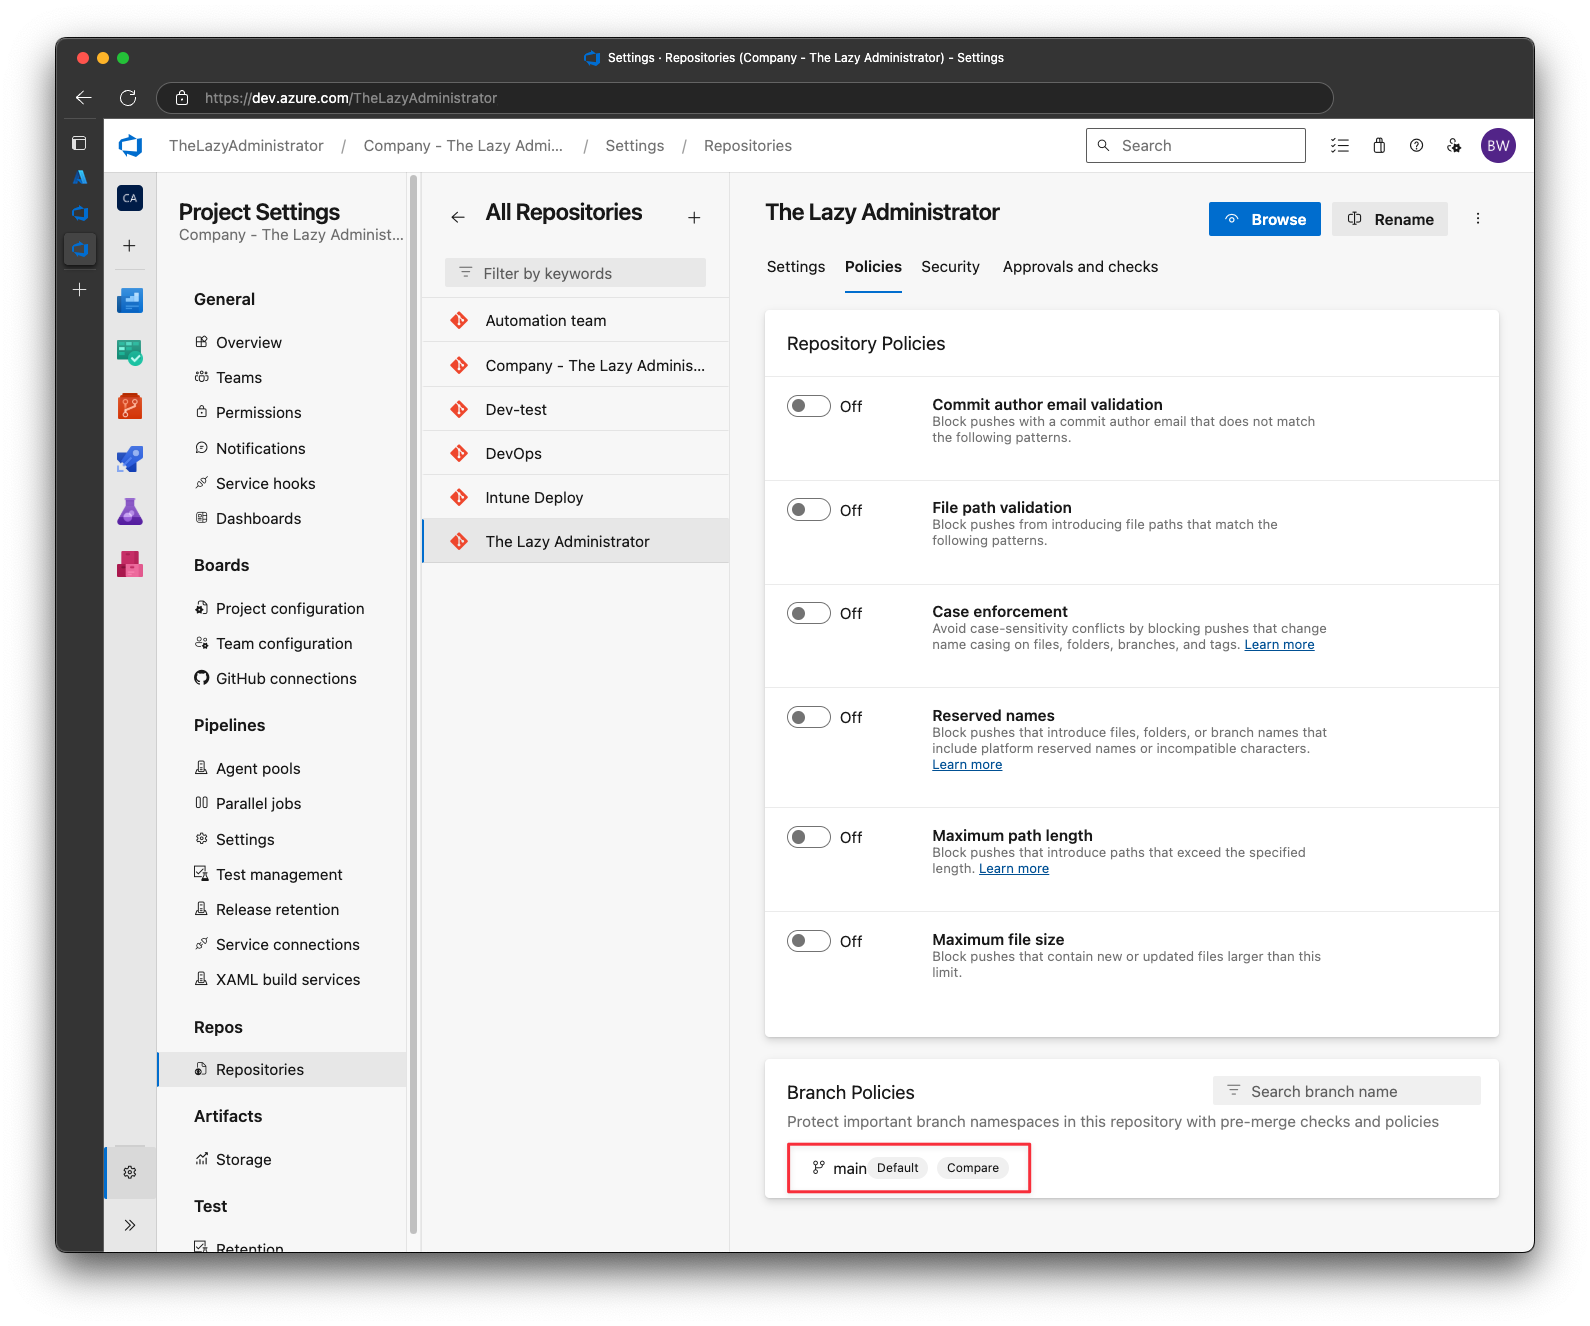
At the bottom, under Branch Policies click your main or master branch
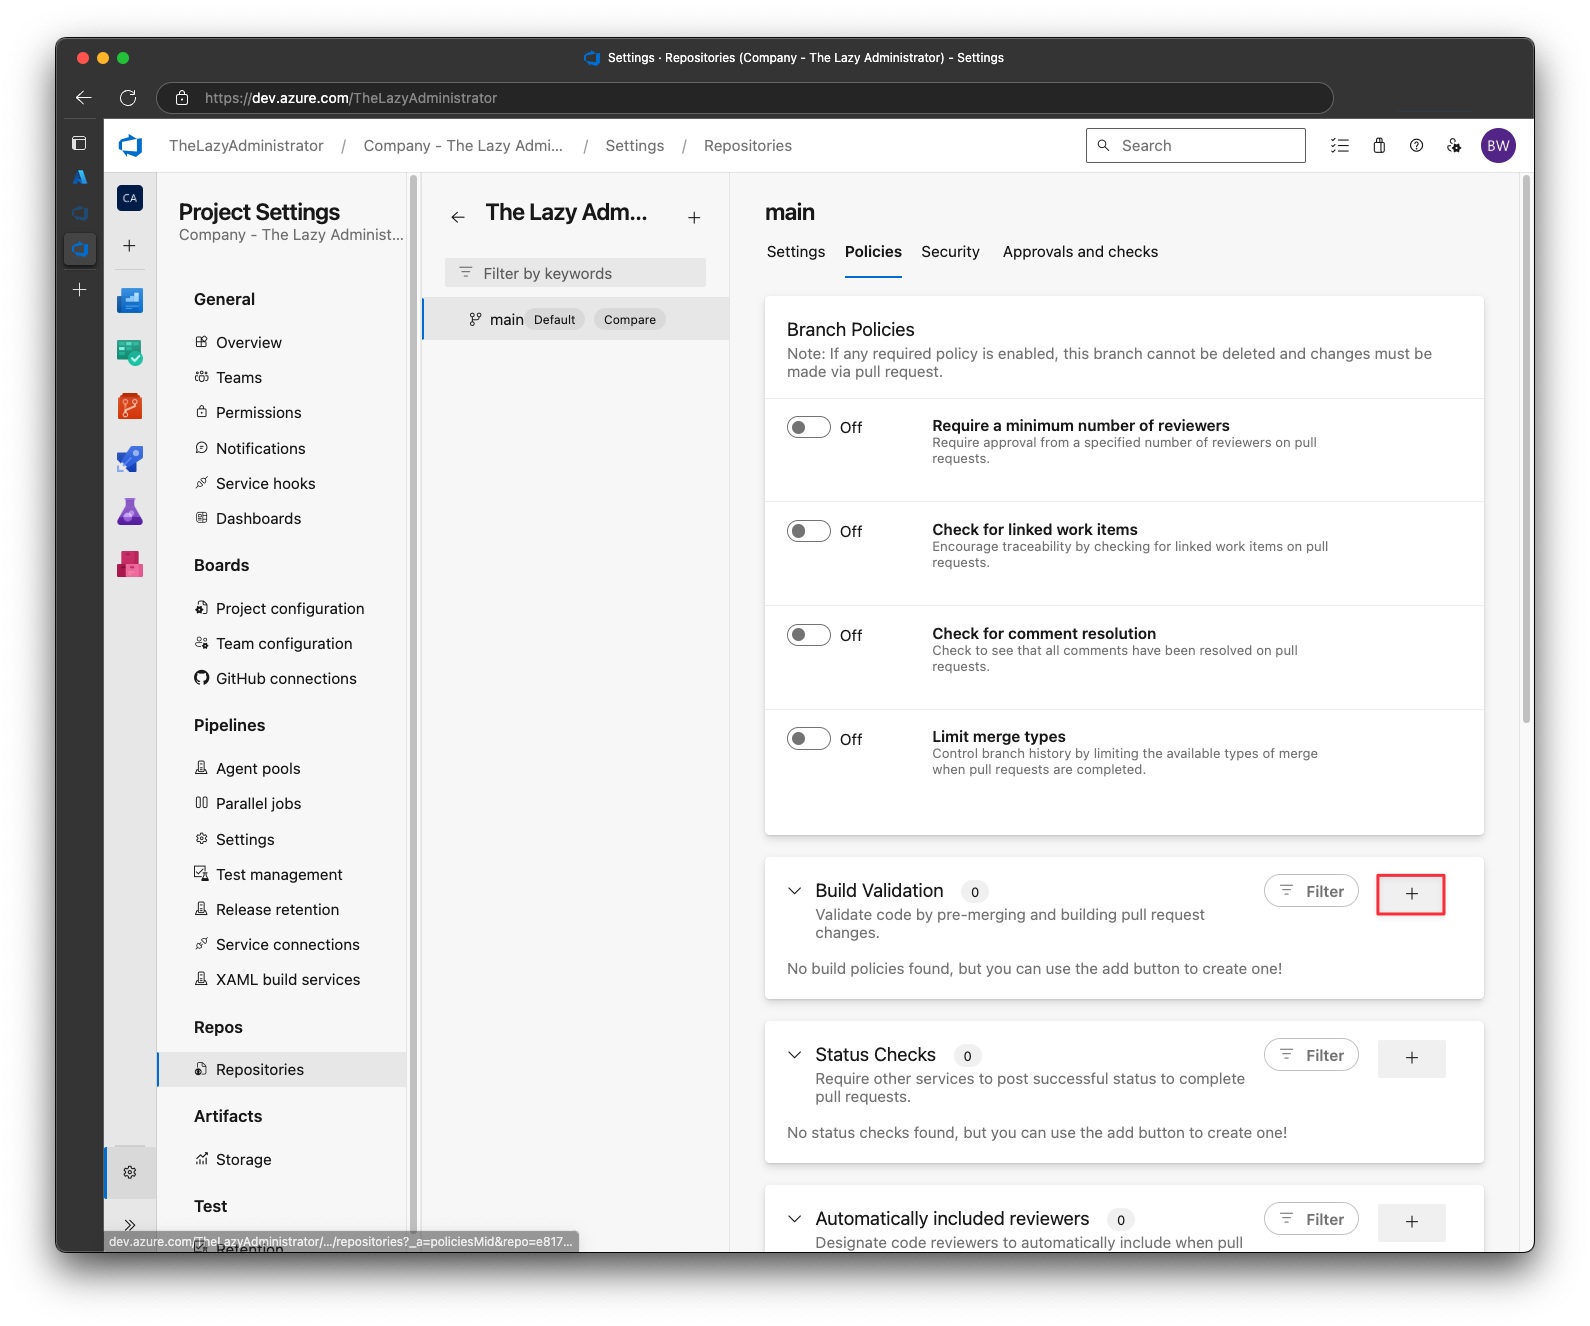
Under Build Validation, click the “+” button
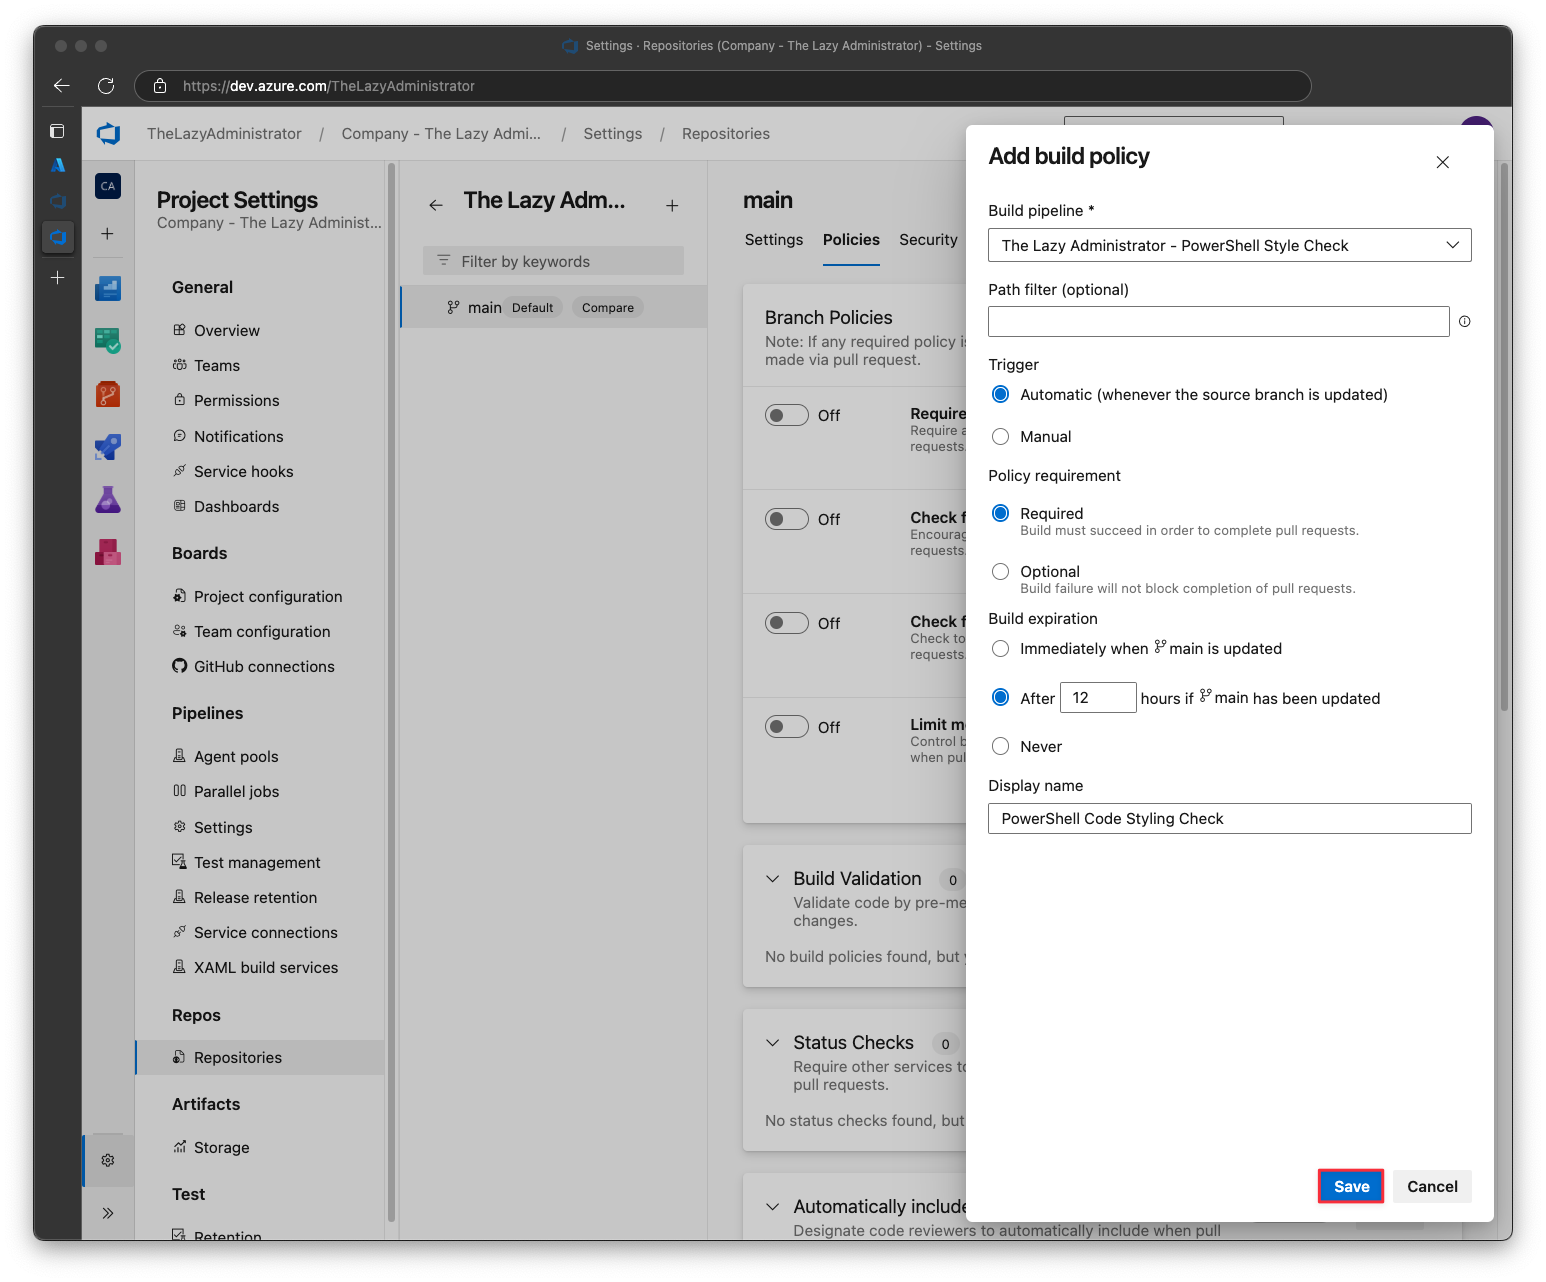
Select the build pipeline you created earlier and the policy requirement that best fits your needs. Give the new build policy a descriptive name. Once finished, click Save
Testing It All
Finally, we want to test it all out to make sure it’s working properly. To do this I am going to commit the file below and then open a new Pull Request.
function new-Message {
    [OutputType([string])]
    param(
        $Message
    )

    $Message = "Message: $Message"
    return $Message
}
Once I commit that to my dev branch and then open a new Pull Request, I can see that the build is automatically started.
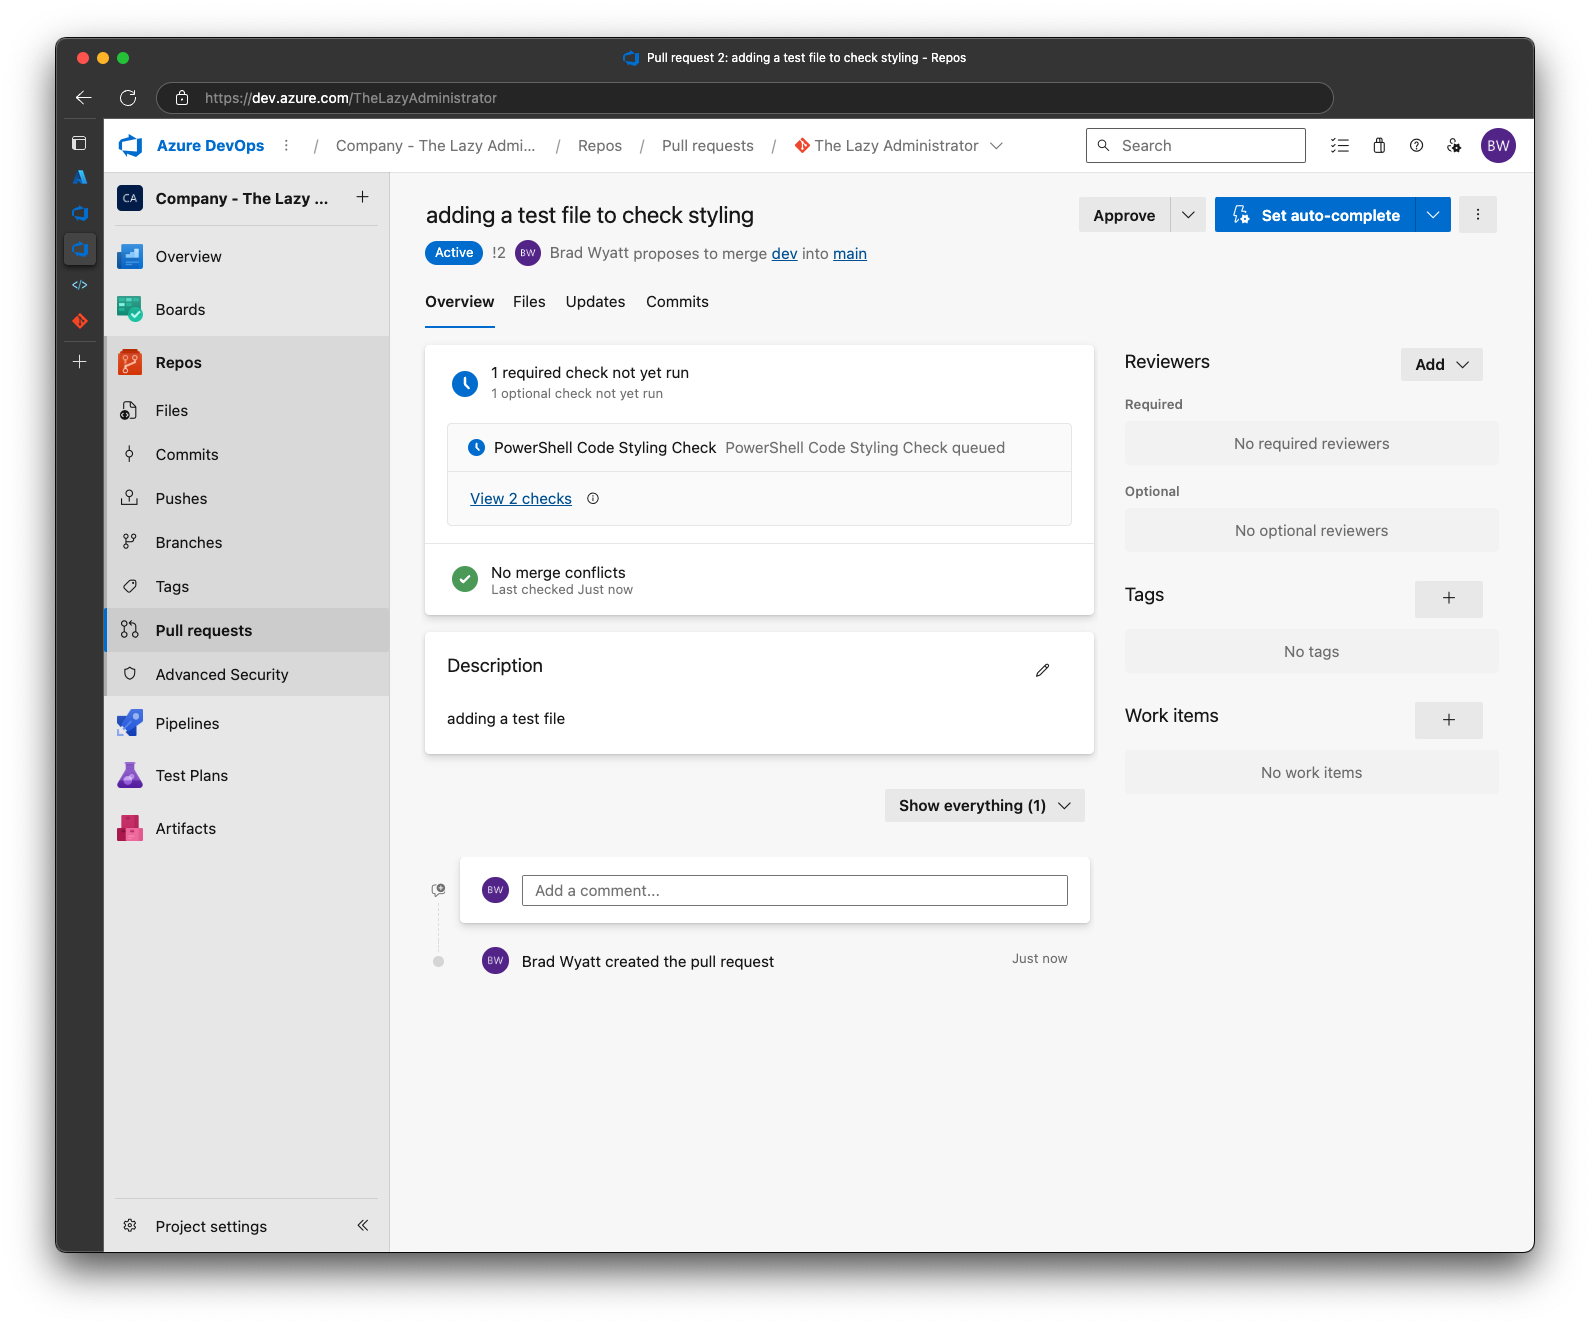
If the status stays as “Queued” for a long time you may have to click on it and grant it permission to the variable group. Click Permit

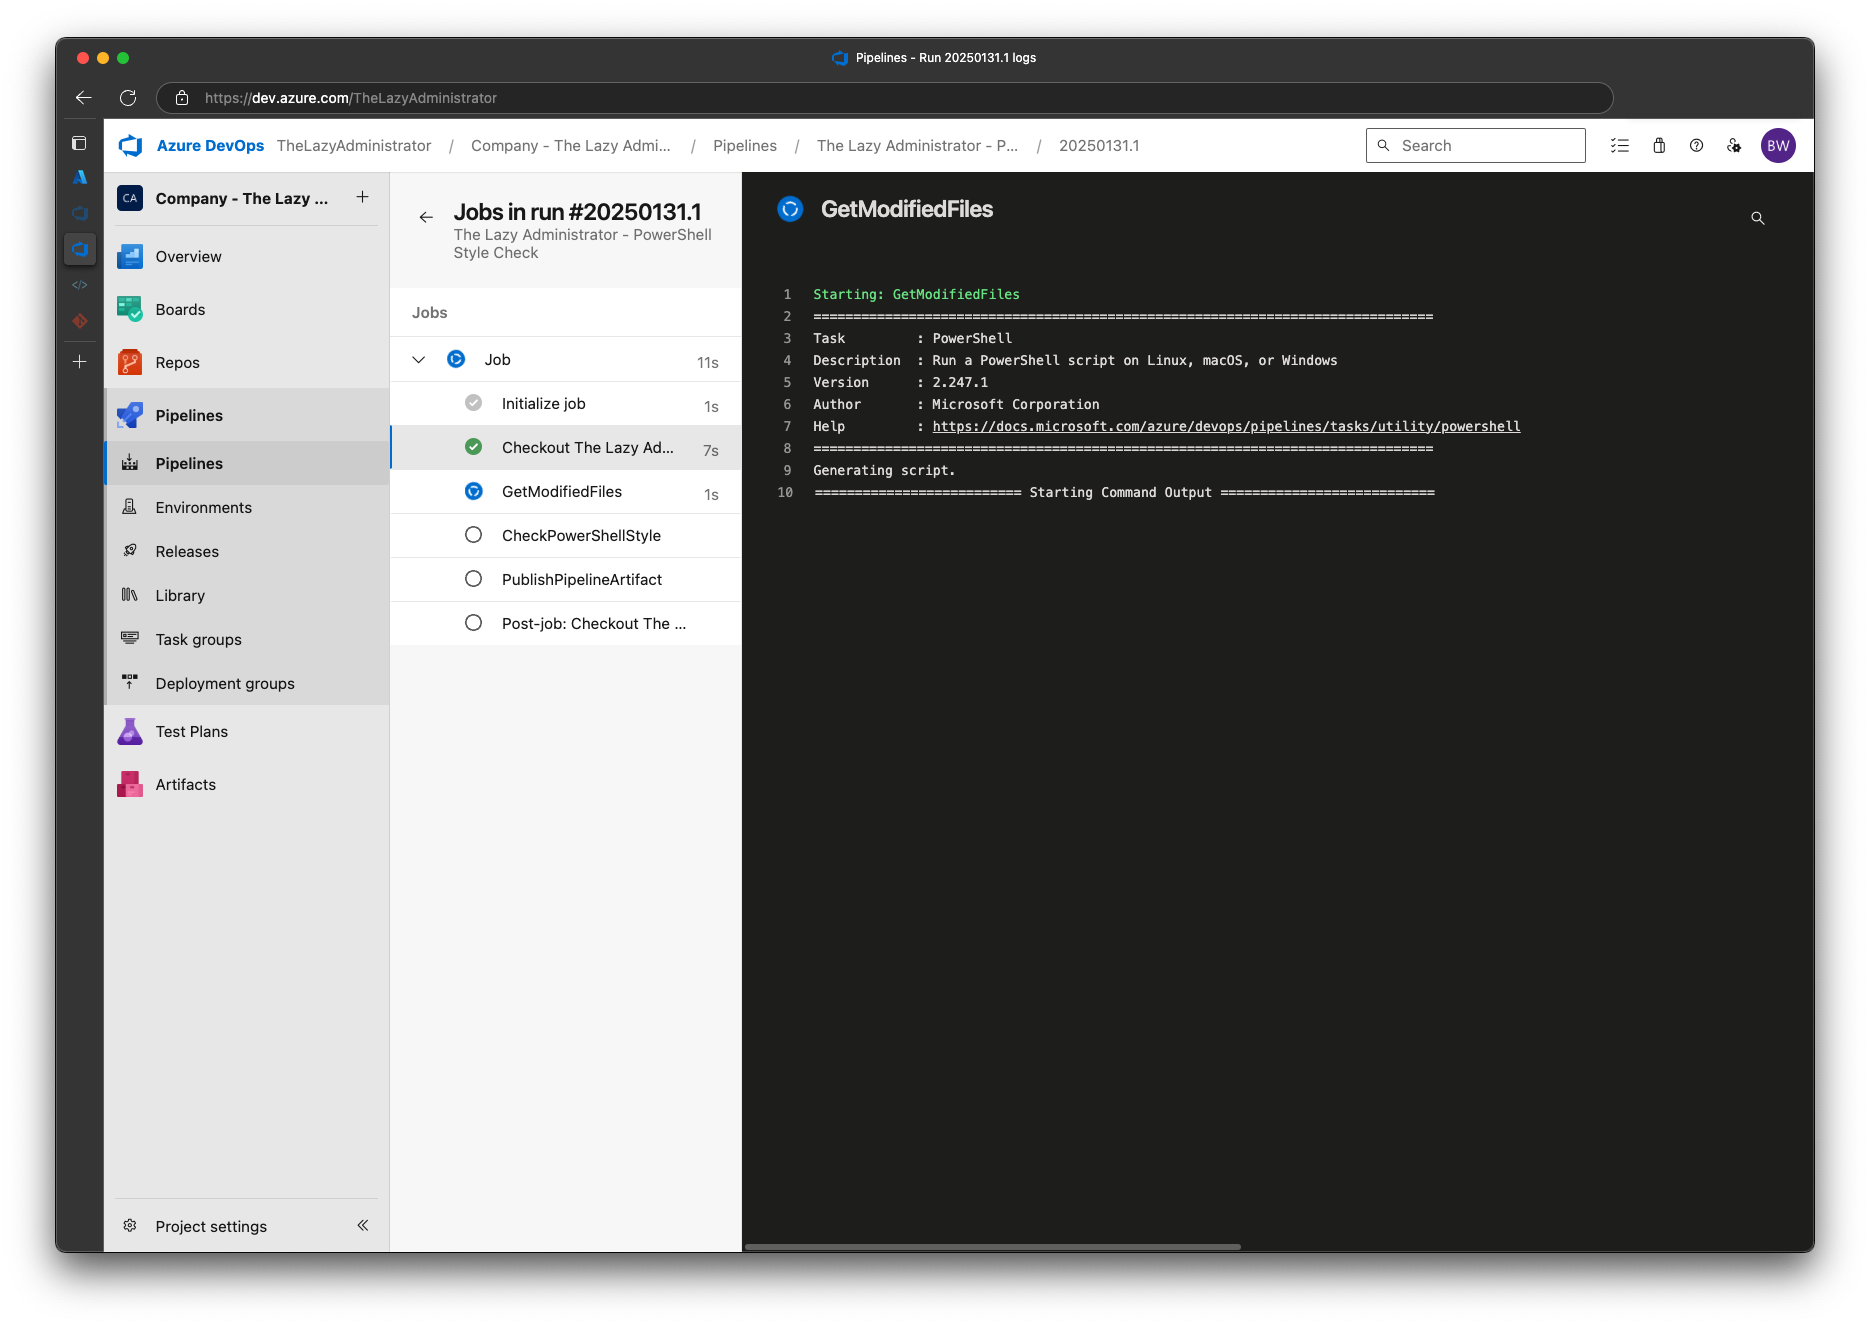
I can now see the pipeline begin to run
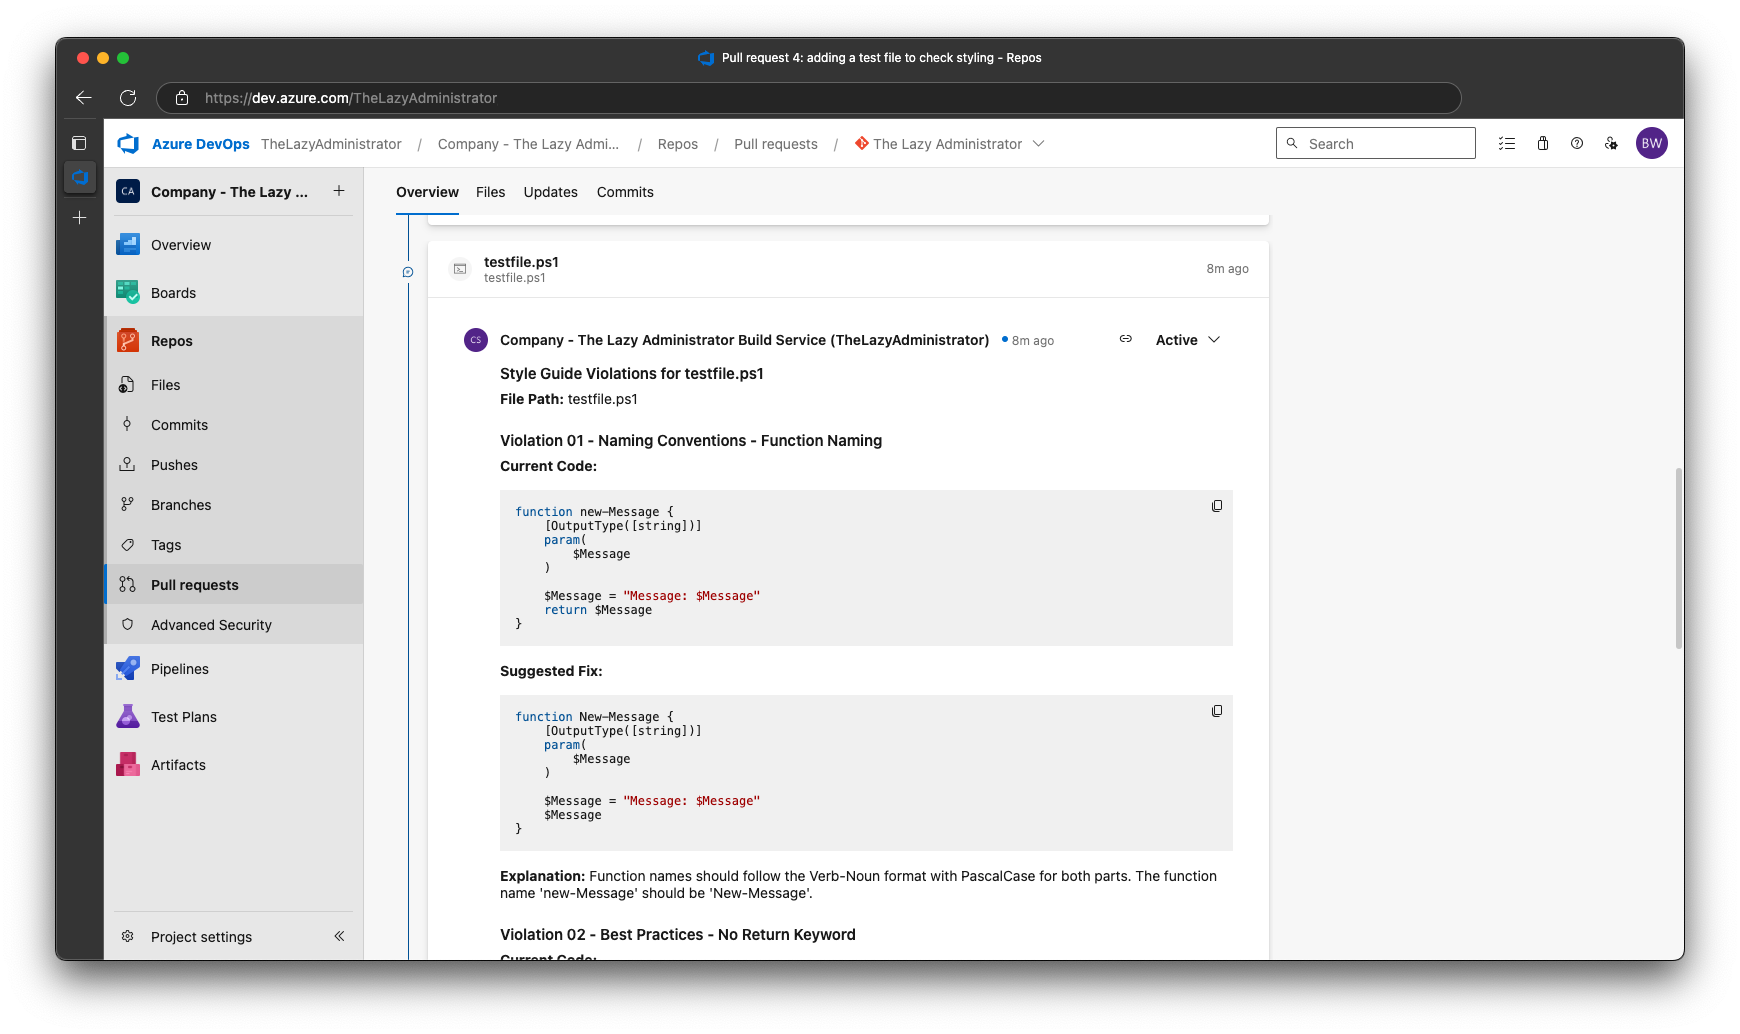
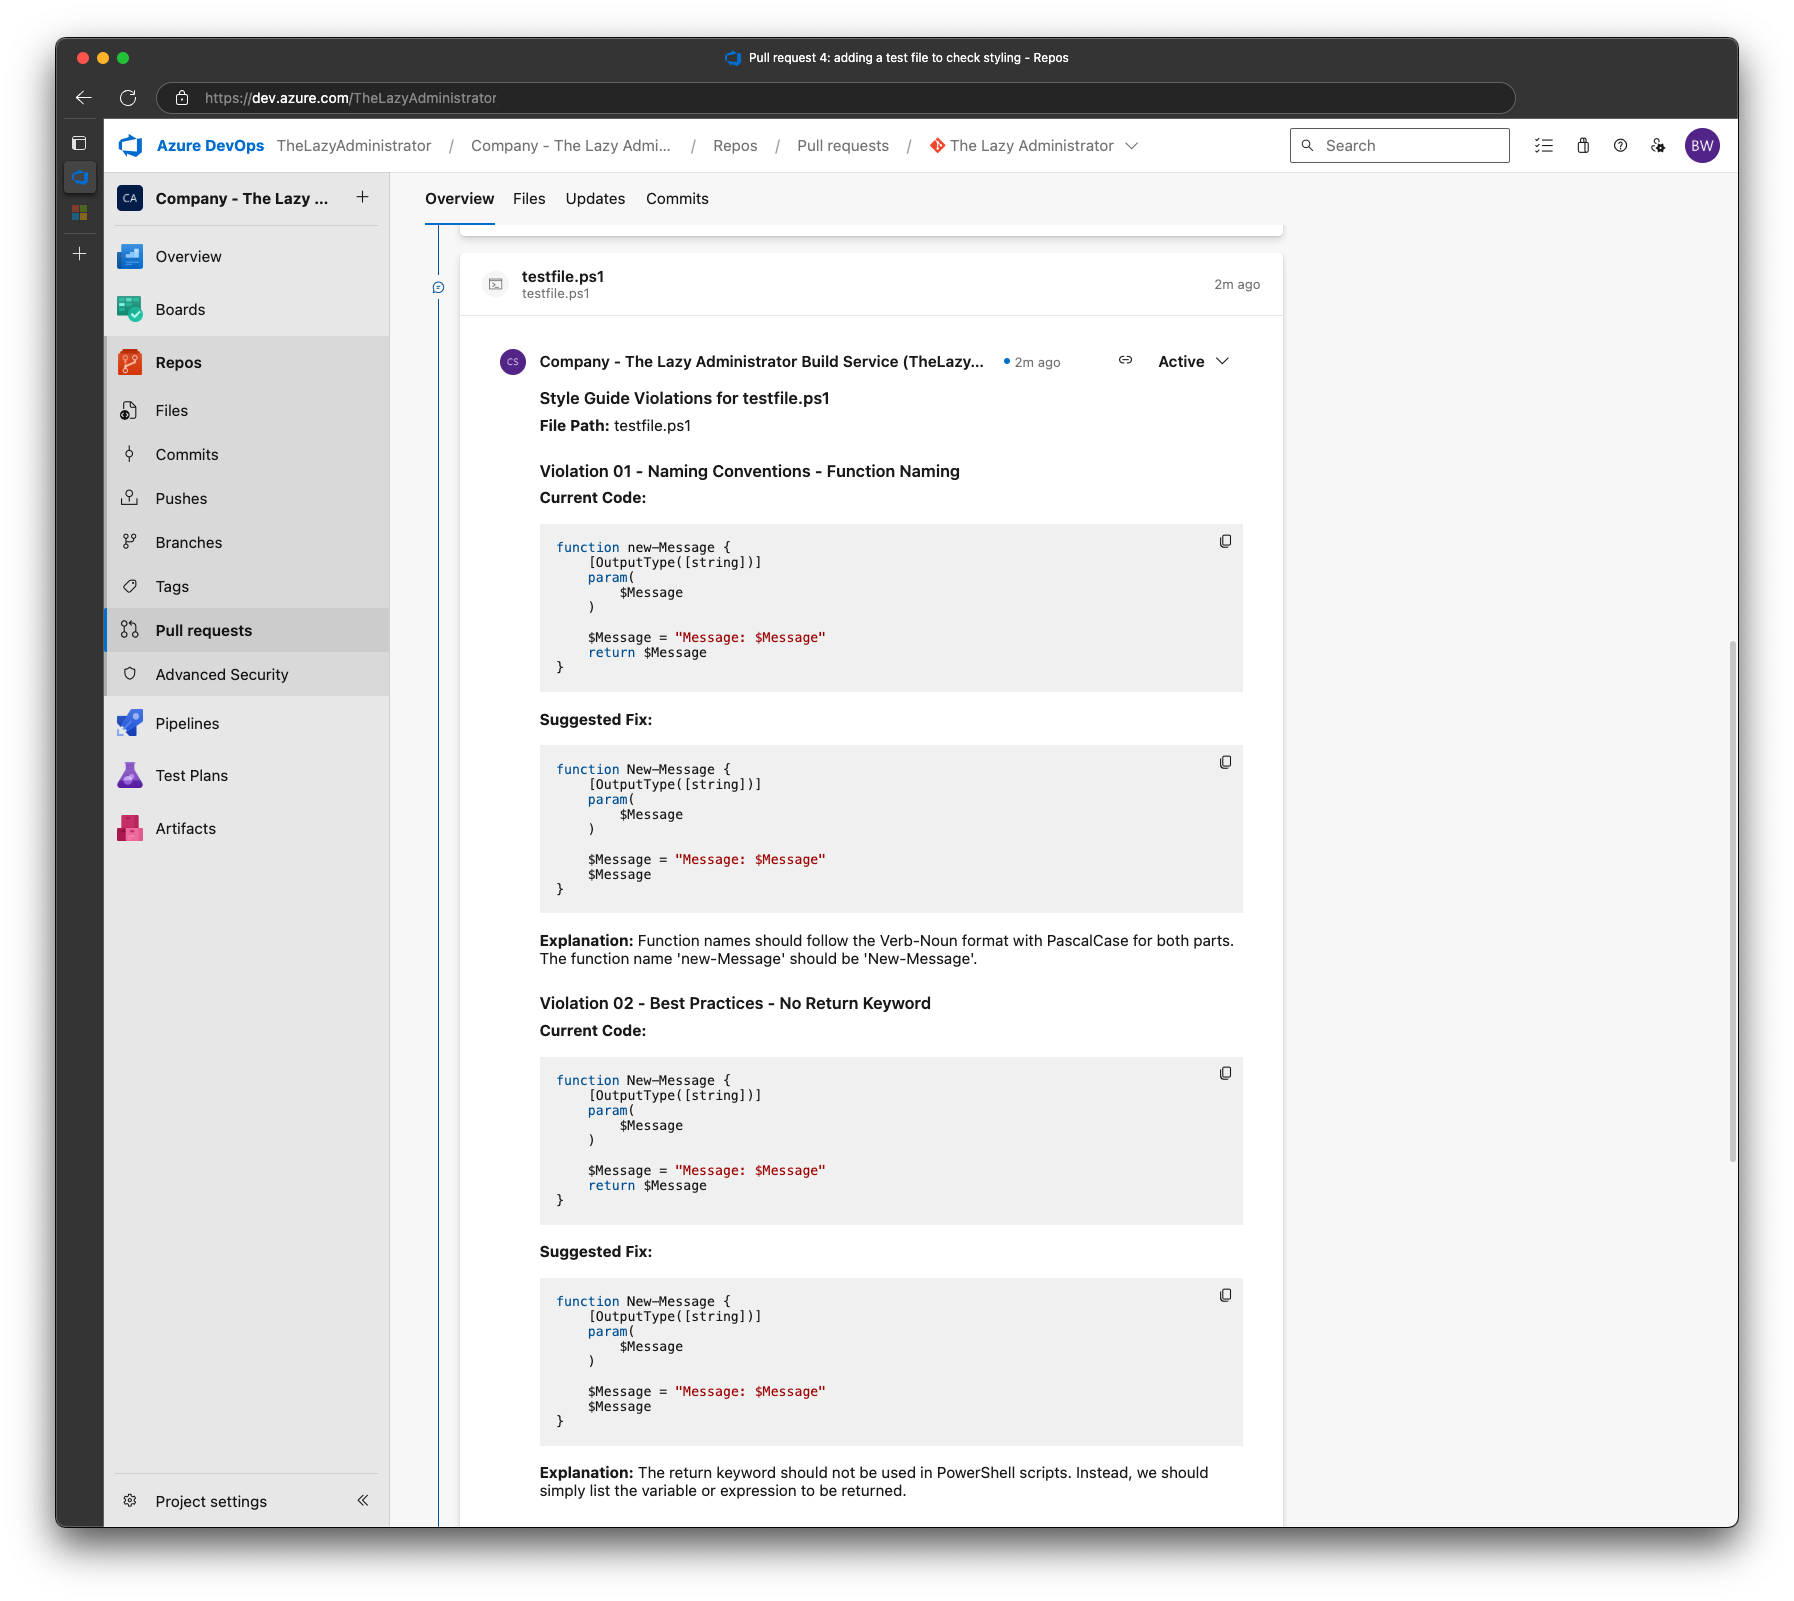
Once it has finished, we can see that the pipeline failed (exit code 1) and I have new comments. The first comment provides an overview on how many files were found to have issues and the total amount of issues across all files. In my example we only had 1 file with 3 issues.

Scrolling down, we can see that there will be 1 comment per file that contains not only the issue, but the explanation and the proposed fix. Containing the violations to a single comment per file makes it easier for someone to review and resolve the issues.
After I make the suggested changes, my new script looks like the following:
function New-Message {
<#
.SYNOPSIS
Creates a new message.
.DESCRIPTION
This function takes a string as input and prepends it with "Message: ".
.PARAMETER Message
The content of the message.
.EXAMPLE
New-Message -Message "Hello, World!"
#>
[CmdletBinding()]
[OutputType([string])]
param(
[string]$Message
)
begin {
}
process {
$Message = "Message: $Message"
$Message
}
end {
}
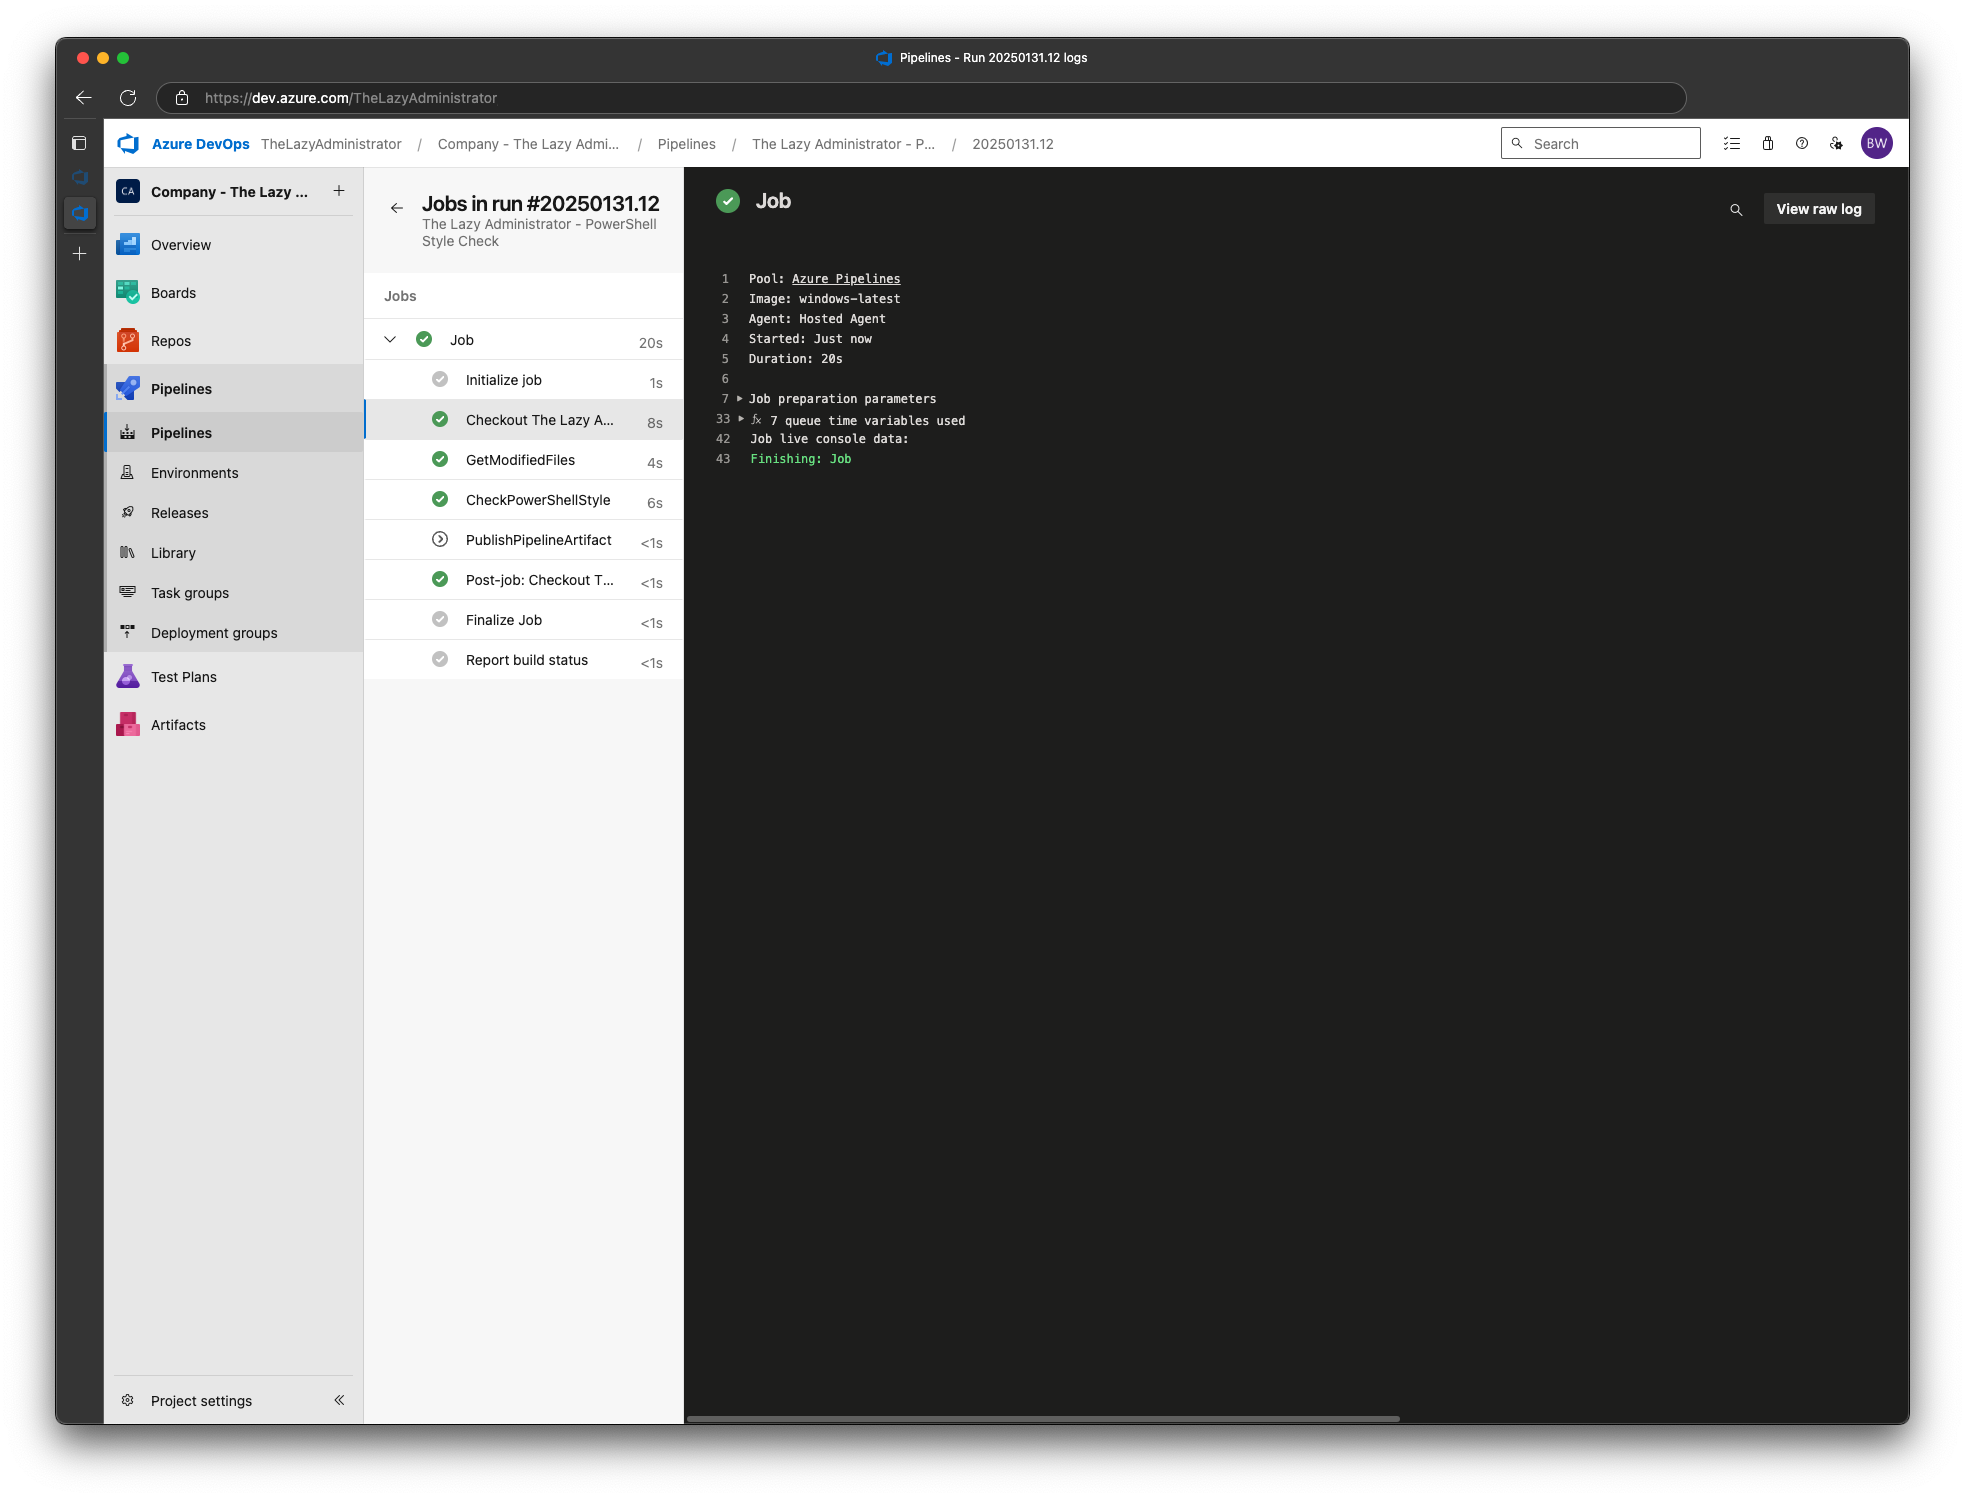
}I can also go through the comments in the pull request and mark them as “Resolved” as I fix them or add additional comments. Now that I made my changes and made my commit, the pull request will run automatically and now it passes!


My name is Bradley Wyatt; I am a 6x Dual-Microsoft Most Valuable Professional (MVP) in Microsoft Azure and Microsoft 365. I have given talks at many different conferences, user groups, and companies throughout the United States, ranging from PowerShell to DevOps Security best practices, and I am the 2022 North American Outstanding Contribution to the Microsoft Community winner.